Create an email campaign
Before you create your first campaign, make sure you have created your first message as well. You can't create a campaign without a message.
- To create an email campaign, click on Campaigns > Manage Campaigns. Here you will be able to see all the campaigns you have created so far, ordered by category.

- Click on the Create new campaign button and select Create new email campaign from the drop-down menu.

-
On the first page, you will need to fill in the name of your campaign, the subject line, the sender data and the message you want to send. Note that you have to use a validated sender email address. You can use a previously validated email address or you can add a new one by clicking the Add a new sender button.
 As a sender address, you can also use a placeholder instead of an email address. Flexmail will check if there is a validated email address linked to the placeholder you've selected and the message will be sent with the email address corresponding to that field. This is very useful if you need your campaign to be sent with a specific sender email address for different contacts.
 Before continuing to the next step, we recommend that you check the box Update this campaign with the latest version of my message. This option is very important if you plan or save a campaign and you subsequently change your message or if you make changes to your message while creating a campaign. By checking this box you will make sure that your contacts will receive the most recent version of your message. Otherwise the old version of your message will be forwarded. After you have filled in all the necessary information click on Next.

-
Next, you will have to choose which segments, interest labels and/or preference lists will receive your campaign. You also have the option to exclude certain segments, interest labels and preference by clicking on the Exclude button. Your campaign will not be sent to the contacts you have chosen to exclude. Click on Next to continue.
Attention
If your account already works with the new interests, you can compose segments on the basis of these interests. Next, you can choose which segments will receive the campaign and which ones you want to exclude.
-
On this page you will find an overview of your campaign. Make sure to verify that all the data is correct. In addition to all the data you have filled in up to now, you will also see an overview of your blacklists and link tracking settings. Verify whether any forms or surveys can be found here as well. In case you don't find them here, this implies an incorrect link of the form or the survey to the message. To increase the deliverability of your campaign, check whether the text version of your HTML message has been provided. You can also click on the Preview button to check your message.
 In addition to the overview of your campaign, here you can choose to set up an AB test by clicking the AB testing button. An AB test can help you choose the best features for your campaign. If you do not wish to set up an AB test, click on Next.

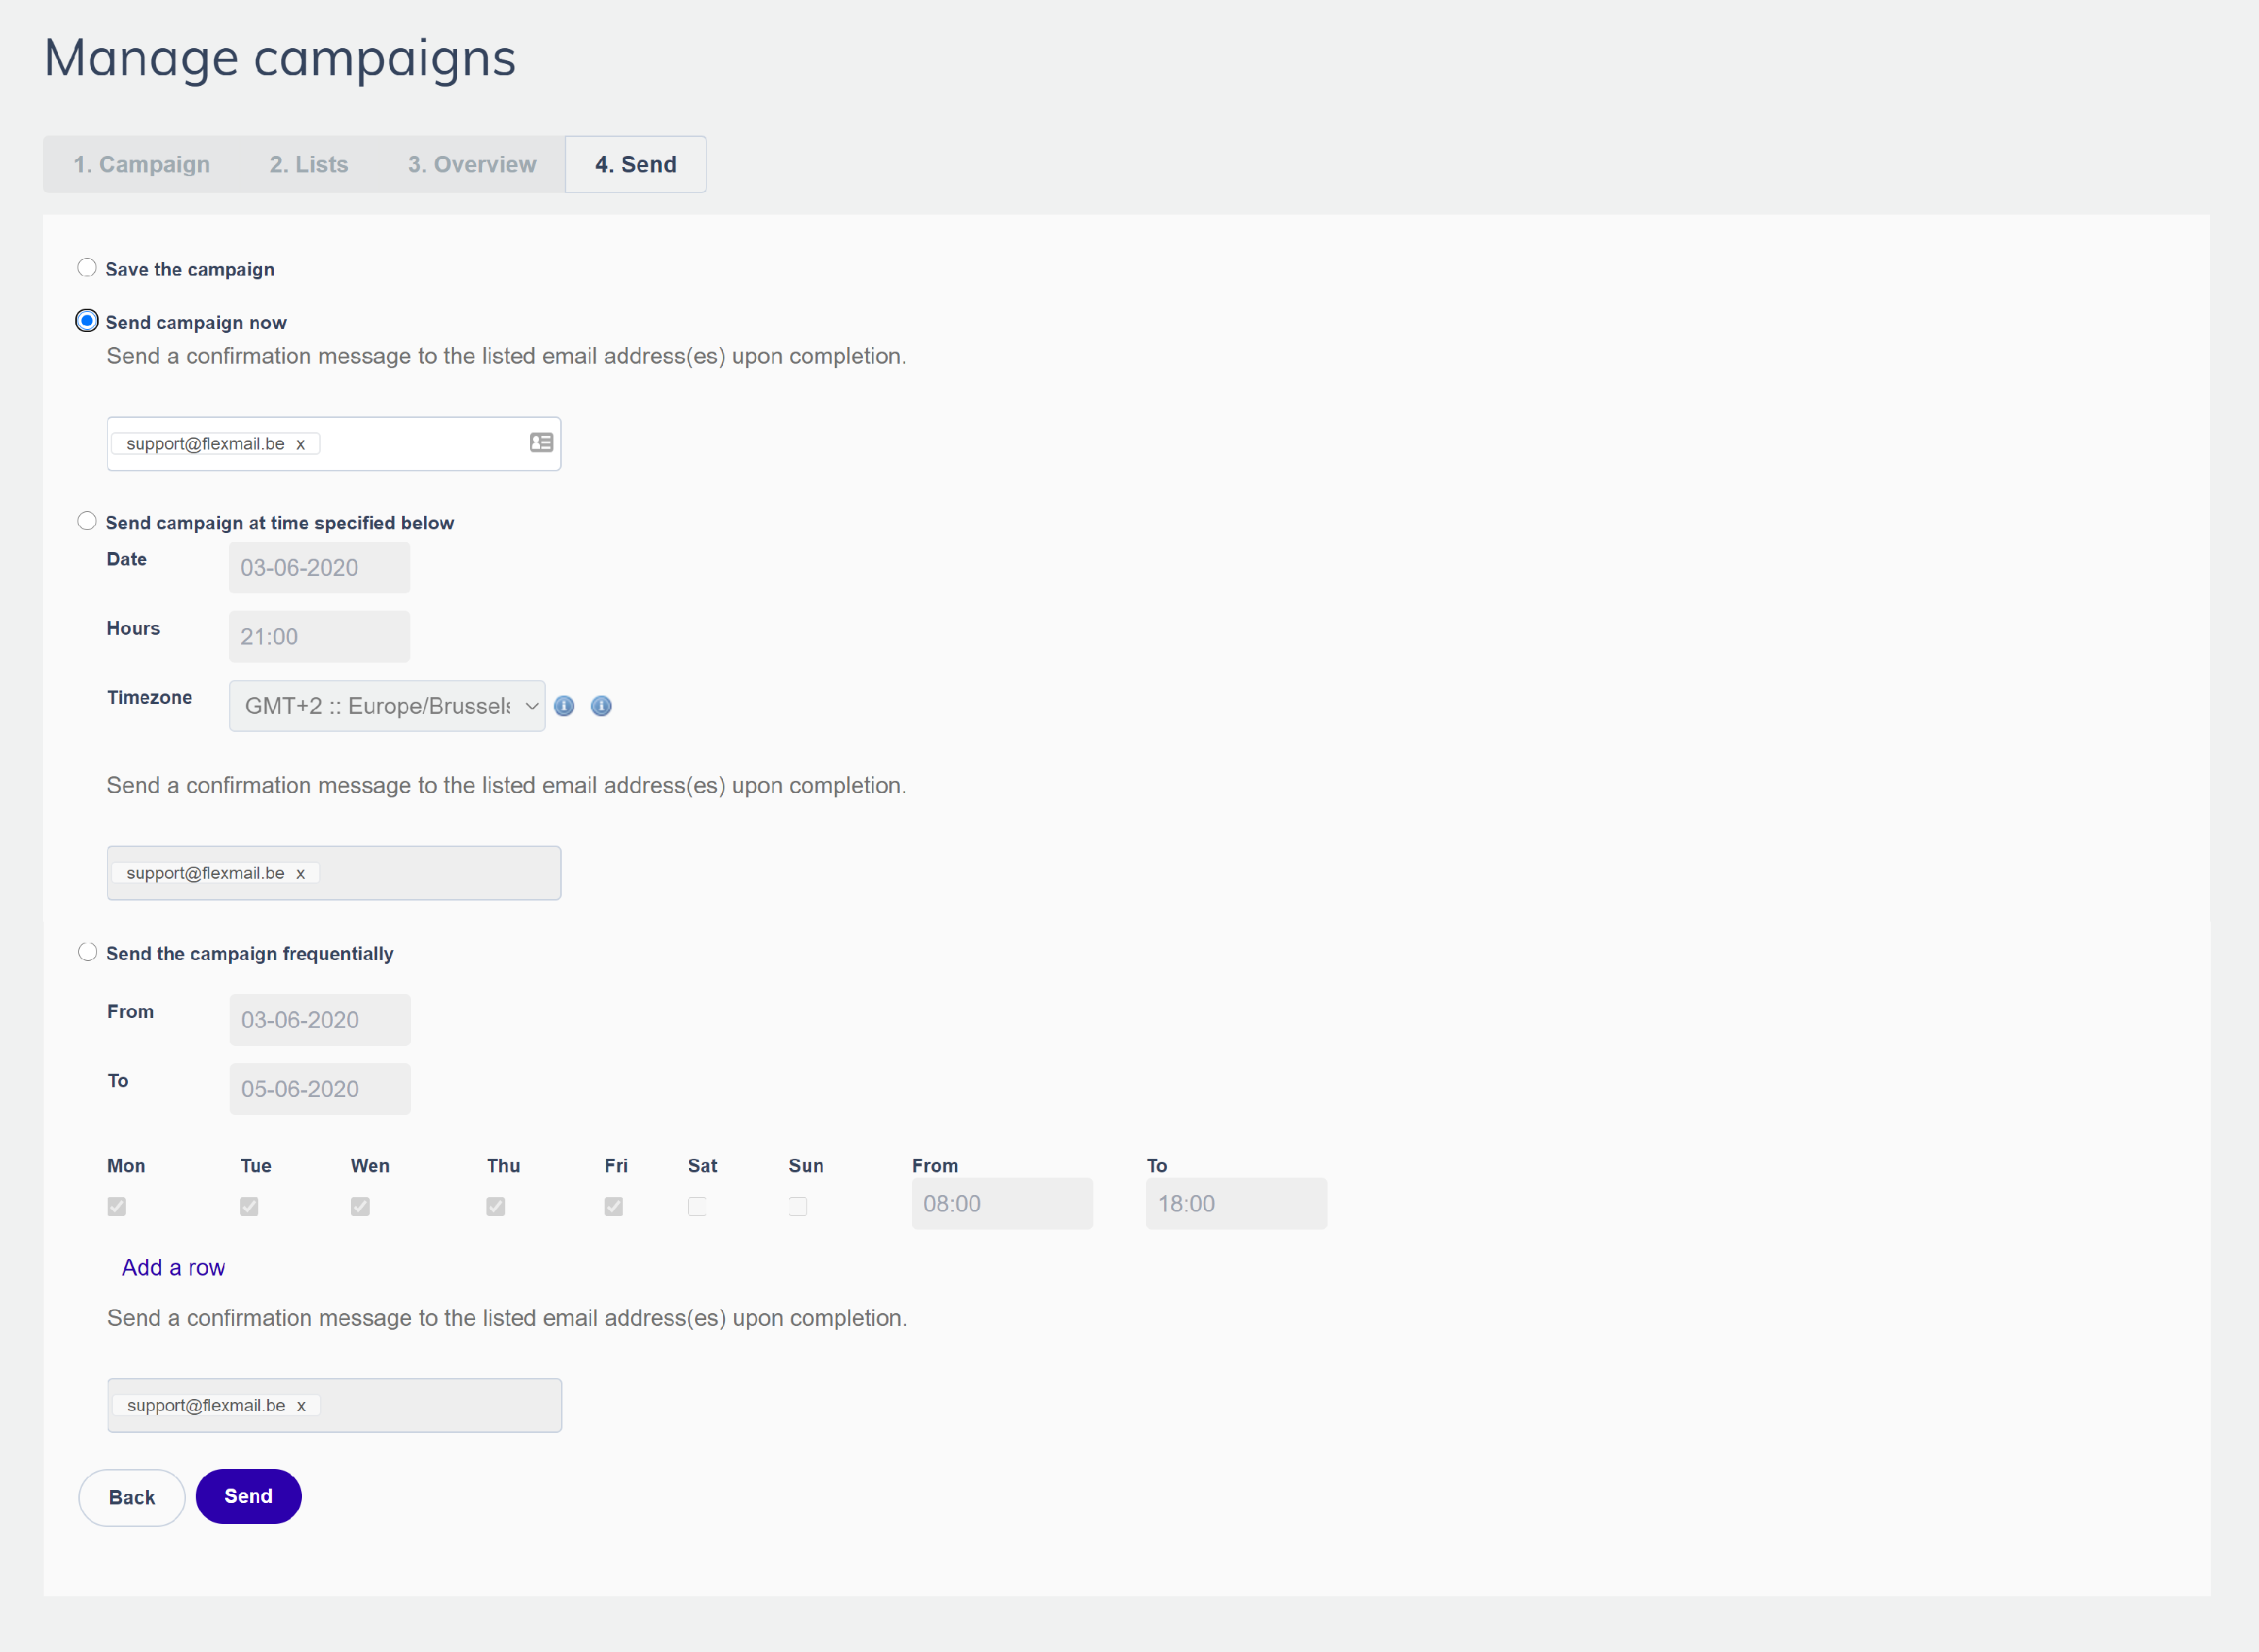
- In the final step of creating your campaign you can choose to:
- Save the campaign
- Send the campaign now
- Send the campaign at a specified time
- Send the campaign frequentially
You can also insert one or several email addresses where Flexmail will automatically send a confirmation email to when the campaign has been sent.


 As a sender address, you can also use a placeholder instead of an email address. Flexmail will check if there is a validated email address linked to the placeholder you've selected and the message will be sent with the email address corresponding to that field. This is very useful if you need your campaign to be sent with a specific sender email address for different contacts.
 Before continuing to the next step, we recommend that you check the box Update this campaign with the latest version of my message. This option is very important if you plan or save a campaign and you subsequently change your message or if you make changes to your message while creating a campaign. By checking this box you will make sure that your contacts will receive the most recent version of your message. Otherwise the old version of your message will be forwarded. After you have filled in all the necessary information click on Next.

 In addition to the overview of your campaign, here you can choose to set up an AB test by clicking the AB testing button. An AB test can help you choose the best features for your campaign. If you do not wish to set up an AB test, click on Next.
Your campaign must contain an unsubscribe button in order to be sent.
Do not remove contacts before the campaign is completely finished and send. If you do so, the results in your report will not be accurate!