Sender validation and email authentication
Before you can send email campaigns with Flexmail, you need to take care of two things: validating your sender address and setting up email authentication. Think of it as a two-step trust system.
Sender validation proves to Flexmail that you are allowed to send from a specific email address. Email authentication then proves to the receiving mail servers (like Gmail, Outlook and Yahoo) that your emails are legitimate and haven't been tampered with.
Together, these steps help your campaigns land in the inbox instead of the spam folder, and they protect your brand against misuse.
This article walks you through both steps.
Before you start
Make sure you have the following ready:
- For sender validation: access to the inbox of the email address you want to validate. Someone will need to open a confirmation email and click a link.
- For email authentication: access to your domain's DNS settings, or the contact details of someone who does (your domain administrator, webmaster, IT department or hosting provider).
Don't worry if you're not sure what DNS settings are. We explain everything step by step, and Flexmail generates a ready-made report you can simply forward to the right person.
Support tip - Sender validation is required before you can send any campaign. Email authentication is technically not mandatory if you have fewer than 5,000 contacts, but we strongly recommend setting it up right away. Major providers like Gmail now reject or spam-filter emails that are not properly authenticated. Even with a small contact list, authentication makes a real difference in whether your emails actually reach people.
Part 1: Validate a new sender address
Sender validation ensures that the owner of an email address has agreed to let it be used as a sender in your Flexmail account. You only need to do this once per email address.
Step-by-step
-
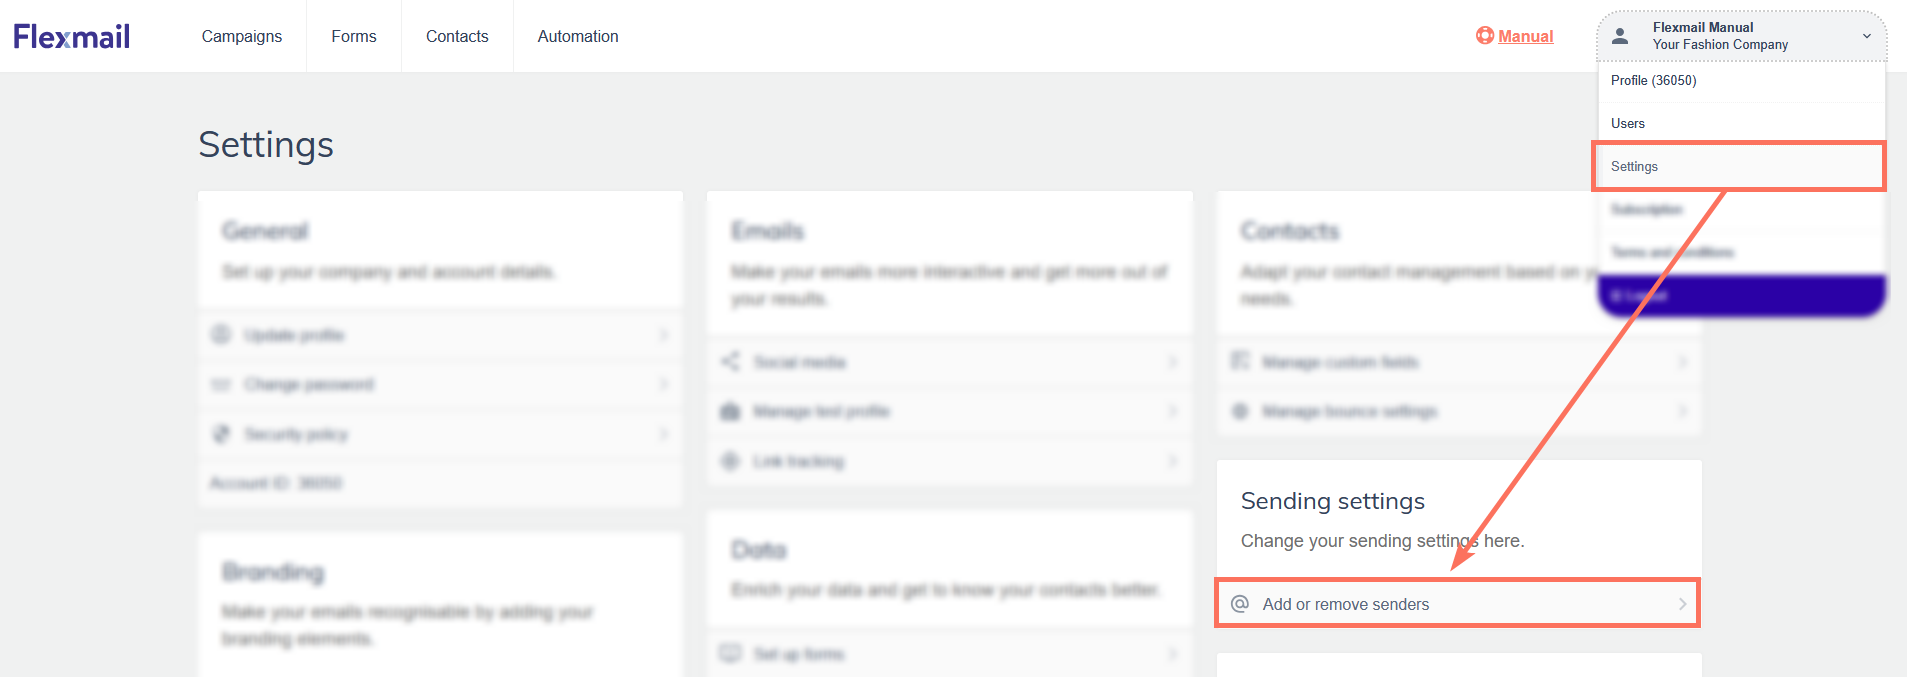
Go to Settings > Add or remove senders in your account.
-
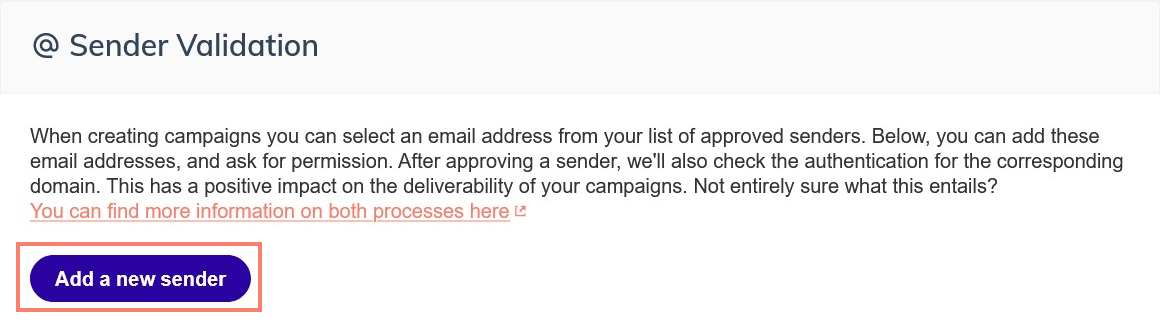
Click on the Add a new sender button.
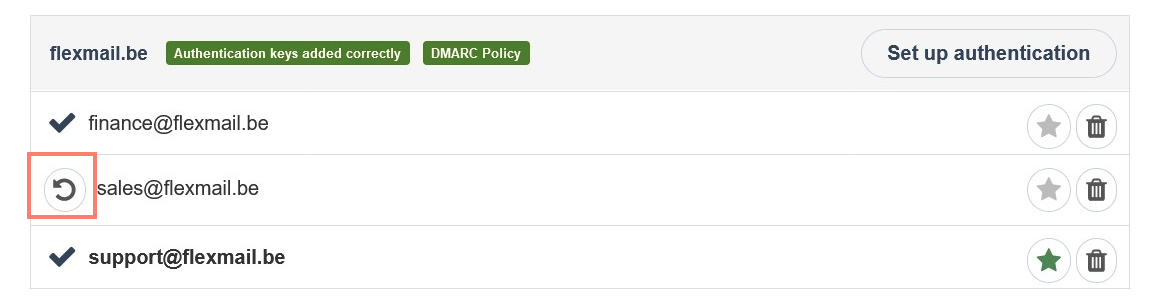
If you already have a sender address that hasn't been validated yet, you will see a Resend approval email button next to it. Click it to request a new confirmation email.
-
A pop-up will appear. Enter the email address you want to use as a sender, then click Request approval.

-
A confirmation email will be sent to the email address you entered. The owner of that email address needs to open the email and click on Verify my email address to give their consent.

This is an important step. Flexmail sends the confirmation to the actual inbox of that address, so someone needs to be able to receive and read it.
- Once the address has been verified, a checkmark icon will appear next to it. You can now use this email address to create and send campaigns.
-
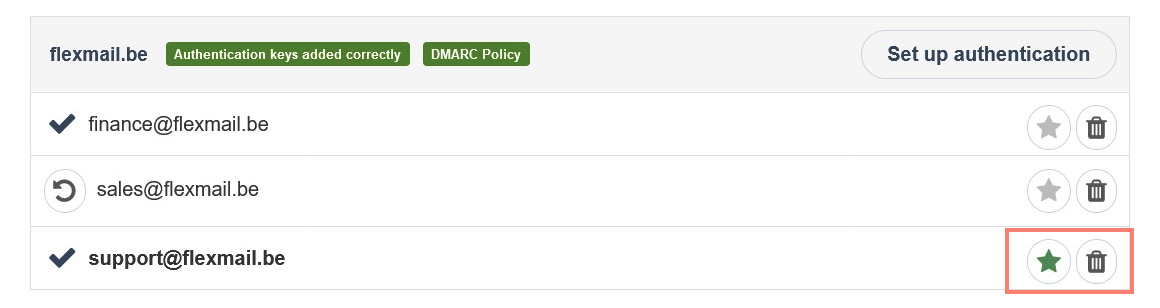
Click the star icon next to an email address to set it as your default sender. This address will be pre-selected whenever you create a new campaign. To remove a sender address you no longer need, click the Remove sender button to the right of it and confirm.


Attention - Make sure to use an email address that actually has an accessible inbox. A no-reply address, for example, often doesn't have a real mailbox behind it, which makes it impossible to complete the validation. We won't be able to validate the address for you, so keep this in mind when adding sender addresses.
Support tip - You can add multiple sender addresses to your account, but every address needs to be validated individually. If you're not sure which sender address and sender name to use for different types of communication, our blog post Determine your sender details once and for all walks you through setting up a clear naming convention.
Part 2: Set up email authentication
Now that your sender address is validated, Flexmail knows you're allowed to send from it. But the receiving mail servers (Gmail, Outlook, Yahoo and others) don't know that yet. Email authentication is the step that tells them your emails can be trusted.
Authentication involves adding a few DNS records to your domain. Flexmail generates these records for you, so you don't need to figure them out yourself. In most cases, you just forward a file to the person who manages your domain.
What are SPF, DKIM and DMARC?
You will see three types of records in the authentication setup. Here's what they do in simple terms:
- SPF (Sender Policy Framework) tells receiving mail servers which servers are allowed to send email on behalf of your domain. It's like a guest list for your domain.
- DKIM (DomainKeys Identified Mail) adds a digital signature to every email you send, so the recipient can verify the message hasn't been changed on the way. Think of it as a sealed envelope.
- DMARC (Domain-based Message Authentication Reporting and Conformance) ties SPF and DKIM together and tells mail servers what to do if a check fails: accept, quarantine or reject the message.
Want to understand the technical details? Our blog post Everything you need to know about email authentication explains each record in depth.
Step-by-step
-
Go to Settings > Add or remove senders in your account.
-
Your sender addresses are grouped by domain. Click the Set up authentication button next to the domain you want to authenticate.

- A pop-up will open showing the DNS records that are needed. Each record has a coloured background color:
- Green means the record is already active. No action needed.
-
Red means means the record is not yet active. This could mean it still needs to be added to your domain's DNS, or, in the case of DKIM, that the key hasn't been installed on Flexmail's side yet (see step 5).
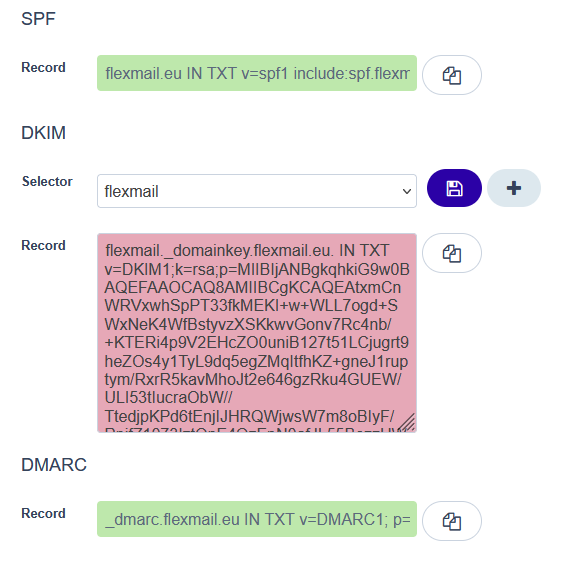
- The SPF and DMARC records are generated automatically by Flexmail. You don't need to do anything to generate them. They just need to be added to the DNS by your domain administrator.
-
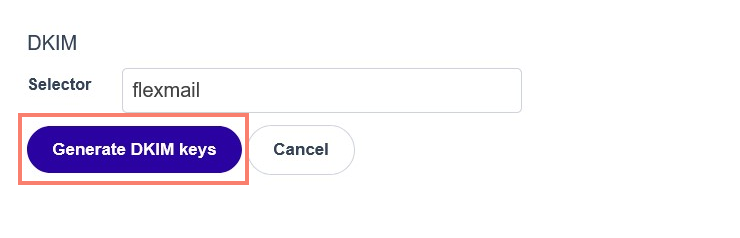
The DKIM key needs to be generated before it can be added. You will see a selector field with a default value of "flexmail".
The selector is simply a label that helps identify which DKIM key was used to sign an email. For most users, this default works perfectly. You would only change it if your domain administrator specifically asks you to.
Click Generate DKIM keys to create the key.
-
Click Generate report at the bottom of the pop-up. A TXT file will download automatically. This file contains all the DNS records your domain administrator needs to add.
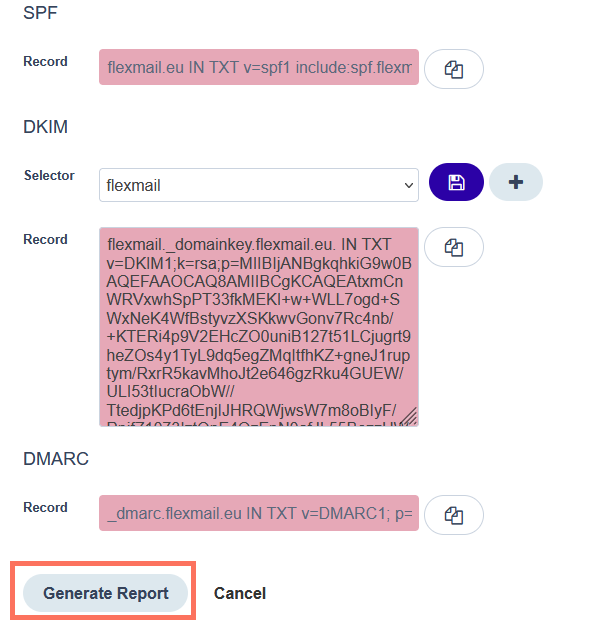
- Forward this file to your domain administrator, webmaster, IT department or hosting provider with a short message, for example: "Could you add these DNS records to our domain? They're needed to authenticate our email campaigns in Flexmail." The person who manages your DNS will know what to do with the file.


Attention - After the records have been added to your DNS, it can take 24 to 48 hours for the changes to take effect. This is normal. The indicators in Flexmail won't turn green immediately.
Verify that authentication is active
After 24 to 48 hours, come back to Settings > Add or remove senders and click Set up authentication again for your domain. If all the boxes have turned green, your authentication is active and working.
If any indicators are still red after 48 hours, here's what to check:
- If the DKIM indicator is red but the badge "authentication keys added correctly" next to the domain in the overview is green, don't worry. This means the DNS records are in place, but the installation on Flexmail's servers is still being processed. This should resolve itself shortly.
- If the badge is red, the DNS records have not been detected yet. Double-check with your domain administrator that the records were added correctly. You can regenerate the report and compare it with what's currently in the DNS.
Need help with DNS?
Combell customers
Great news! Here you will find all the instructions to set up authentication in your Combell control panel. Still not sure how to do it or afraid of doing something wrong? Send your generated report to support@combell.com. They know exactly what to do.
Other hosting providers
If you're hosted elsewhere, your hosting provider's support team can help. Most providers (like OVH, Cloudflare, TransIP, one.com, etc.) have documentation on how to add TXT records. In most cases you can also simply forward the generated report to their support team and ask them to add the records for you.
Common questions
Do I need to set up authentication for every sender address?
No. Authentication is set up per domain, not per email address. If you authenticate the domain example.com, all sender addresses ending in @example.com are covered.
I added the records, but the indicators are still red.
DNS changes can take up to 24 to 48 hours to take effect. This is completely normal. Check again after a day or two.
I can't validate my sender address because no one receives the confirmation email.
Make sure the email address has an accessible inbox. Addresses like no-reply@example.com often don't have a mailbox, which makes validation impossible. Use an address that someone can actually open, like info@ or marketing@ .
What happens if I skip authentication?
Flexmail won't block you from sending if you have fewer than 5,000 contacts, but your emails may end up in spam folders or be rejected entirely by providers like Gmail and Yahoo. We strongly recommend setting up authentication from the start.
Next steps
- See 'Configure bounces' for the other key deliverability setting in your account.
- See 'Getting started with the transactional API', transactional email requires the same authentication setup.