
Campaigns
A campaign is how you send a message to one or more groups of contacts in Flexmail. Campaigns form the core of your email marketing activities: they handle audience selection, the sending schedule, tracking configuration, and reporting, all in one flow.
Flexmail has four campaign types: email, Opt-in, SMS, and test. This article explains what each type does and how to create them.
Prerequisites
- You have at least one validated sender address in Settings > Add or remove senders.
- You have a message ready to send. Create this via Messages before creating an email campaign.
- You have set up your contact list or a segment to use as recipients.
- For SMS campaigns: you need SMS credits and contacts with valid mobile numbers.
- For Opt-in campaigns: your message must contain an #opt-in# placeholder link.
The four campaign types
Email campaign
The standard campaign type you will use most often. Send a message to one or more segments, interests, or preference lists, suitable for newsletters, promotions, product updates, and all other marketing emails.
Opt-in campaign
Used to reconfirm consent from your existing contacts. When you send an Opt-in campaign, all recipients are immediately set to inactive. Contacts who click the confirmation link in your email become active again. Contacts who do not receive the status Unconfirmed after 14 days and can no longer receive campaigns.
Attention Use Opt-in campaigns deliberately. Because all recipients are set to inactive at the moment of sending, this campaign type can significantly reduce your sendable list if response rates are low.
SMS campaign
Send a text message to contacts with a valid mobile number in their profile. SMS campaigns are not included in standard subscriptions; contact sales@flexmail.be for more information. Messages can be 140, 268, or 402 characters long, which costs 1, 2, or 3 SMS credits per contact respectively.
Test campaign
Send a campaign to a small internal test list before sending to your real audience. Results appear as a sub-entry under the associated campaign. You can create as many test campaigns as you want at no extra cost.
Support tip Always send a test campaign before your final send, even for templates you have used before. Email clients update regularly, and a layout that was perfect last month may behave differently today.
Create an email campaign
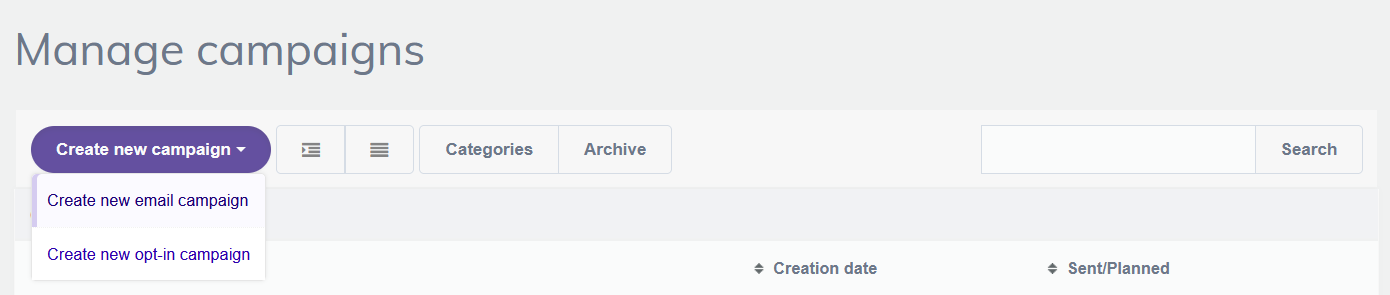
Go to Campaigns, then Manage campaigns, and click Create new campaign > Create new email campaign.
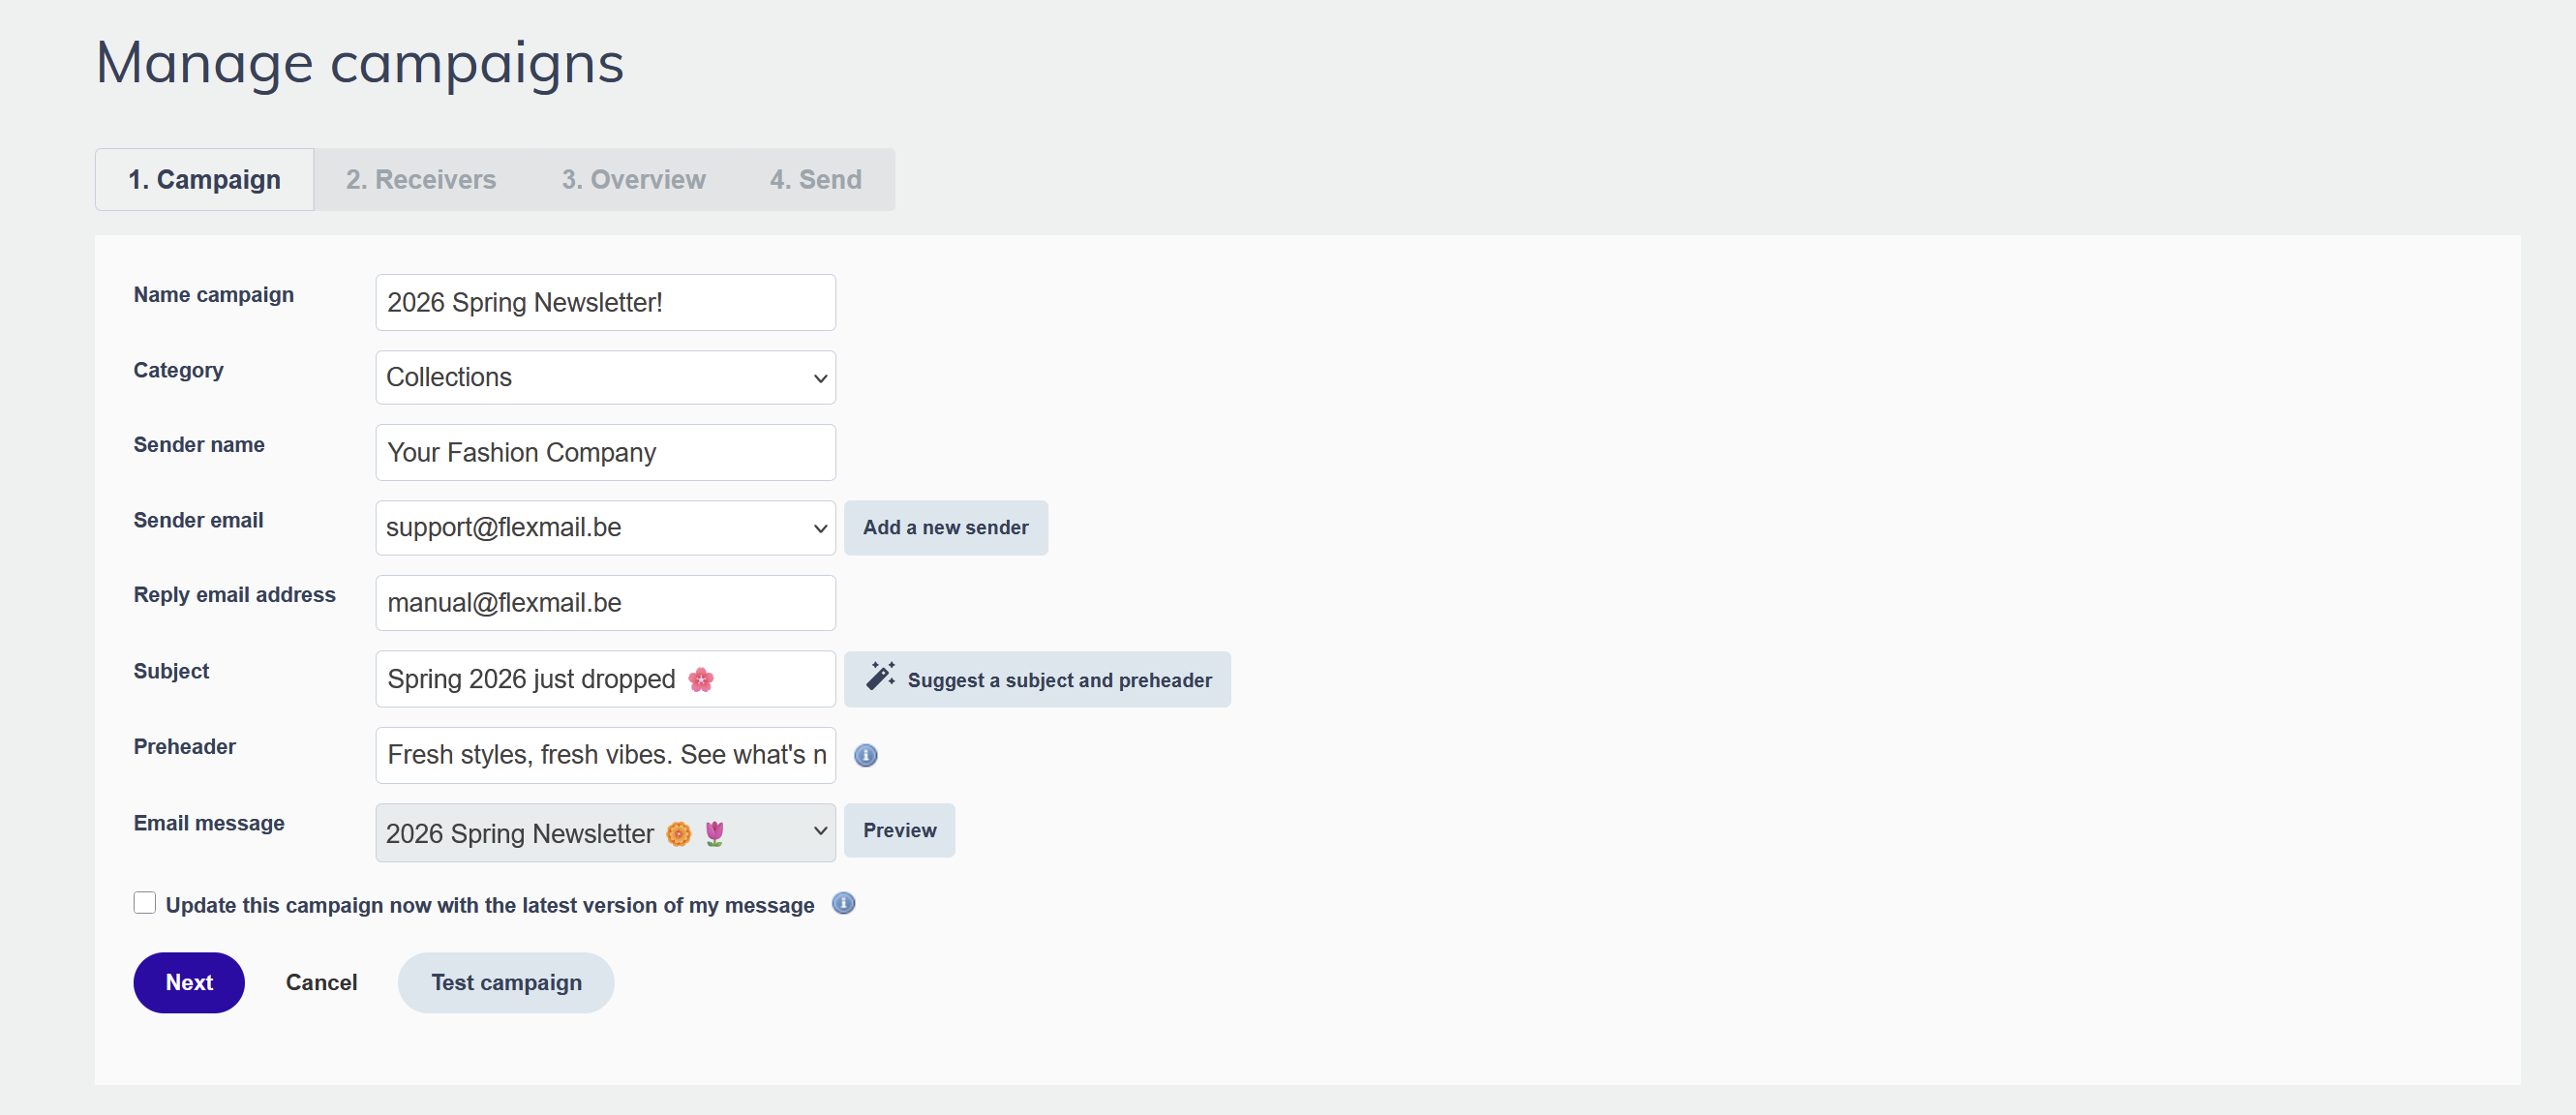
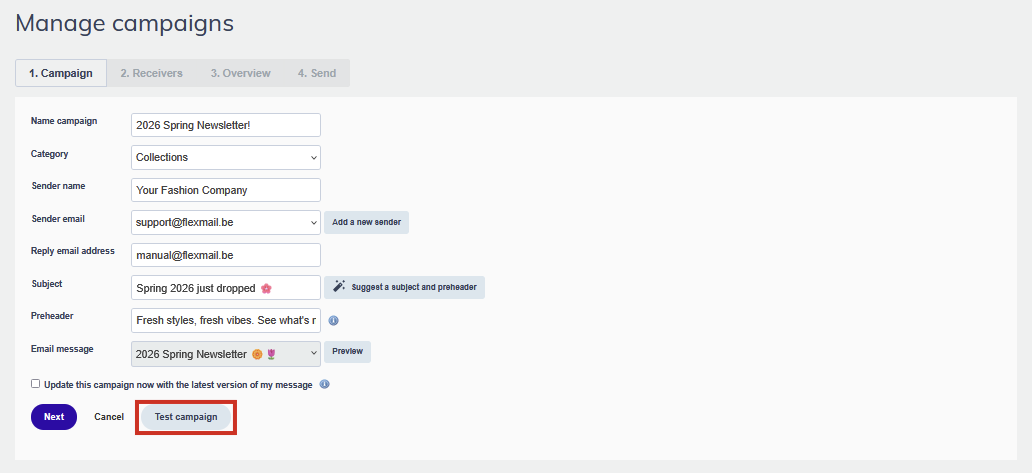
Step 1: campaign details
- Enter a campaign name and choose a category to keep your account organised.
- Enter a subject line.
- Select a validated sender address. If the desired address is not listed, add it first via Settings > Add or remove senders.
- Enter a sender name, which is what contacts see in their inbox before opening your email.
- Optionally, change the reply-to address if you want to send replies to a different inbox than your sending address.
- Select the message you want to send.
- If you might still edit the message before sending, tick "Update this campaign with the latest version of my message".
Support tip You can use a dynamic sender address: Flexmail checks the chosen custom field for each contact and sends from the associated validated email address. Useful if different team members should appear as the sender for their own contacts.
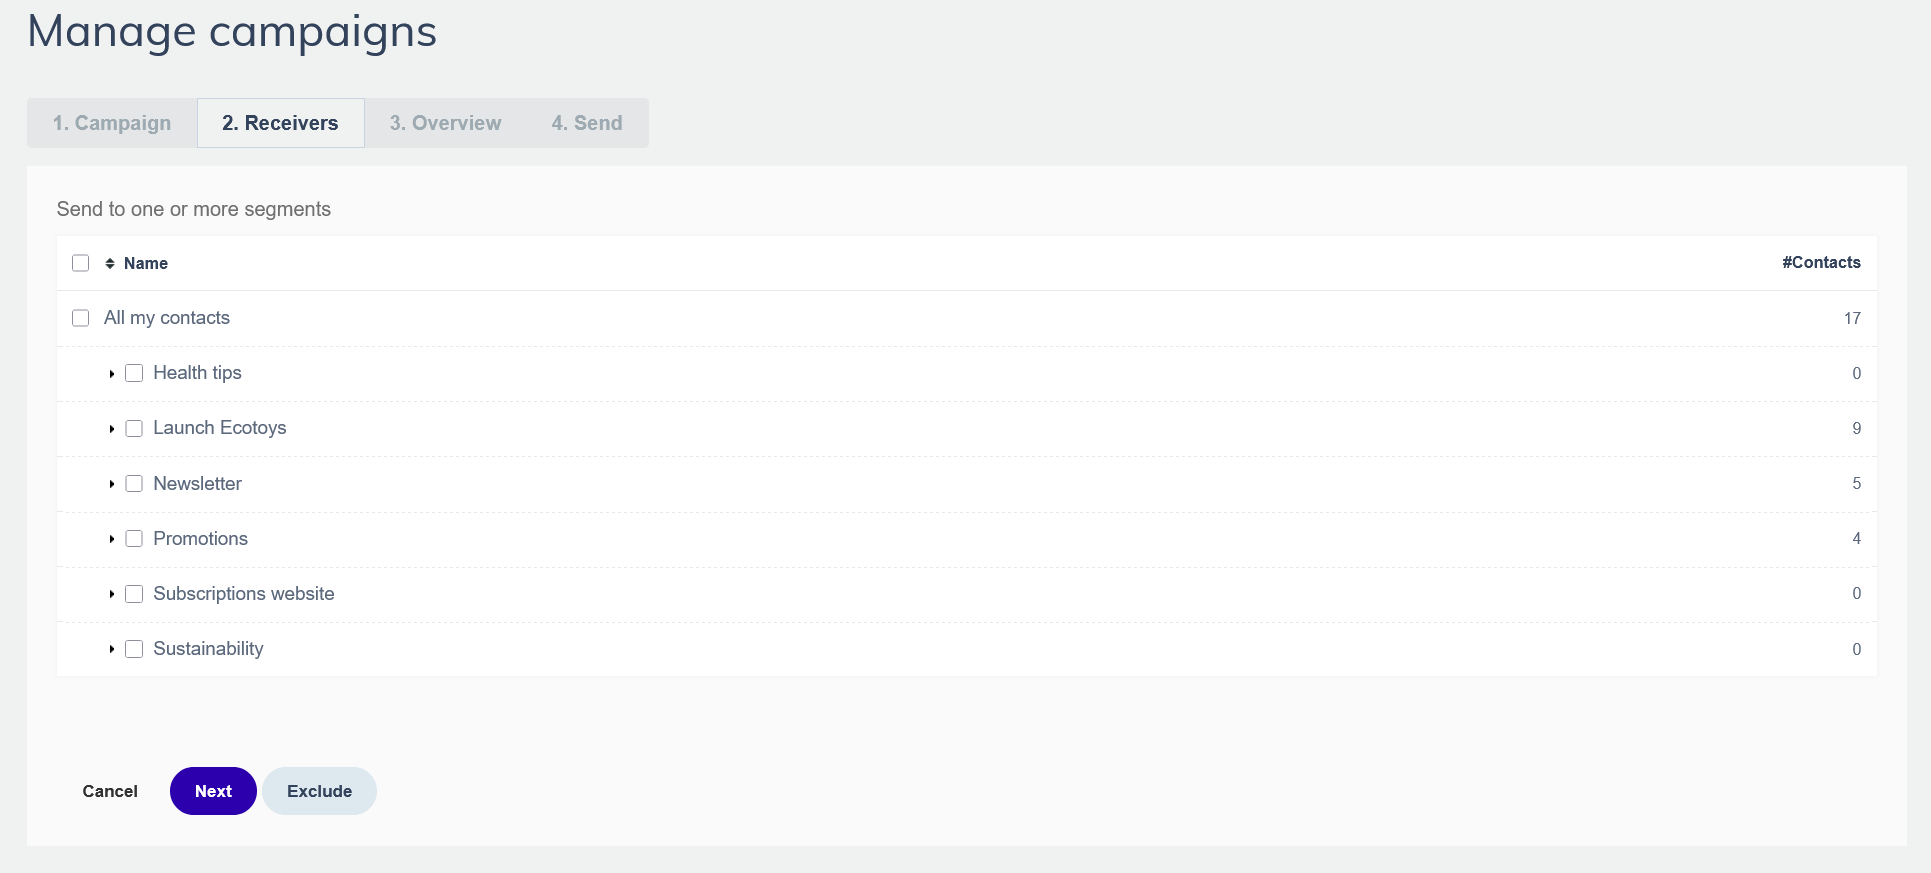
Step 2: select recipients
Choose which segments receive the campaign. You can also exclude specific segments; contacts in an excluded segment will not receive the campaign, even if they also belong to an included segment. If a contact belongs to multiple selected segments, they will only receive the campaign once.
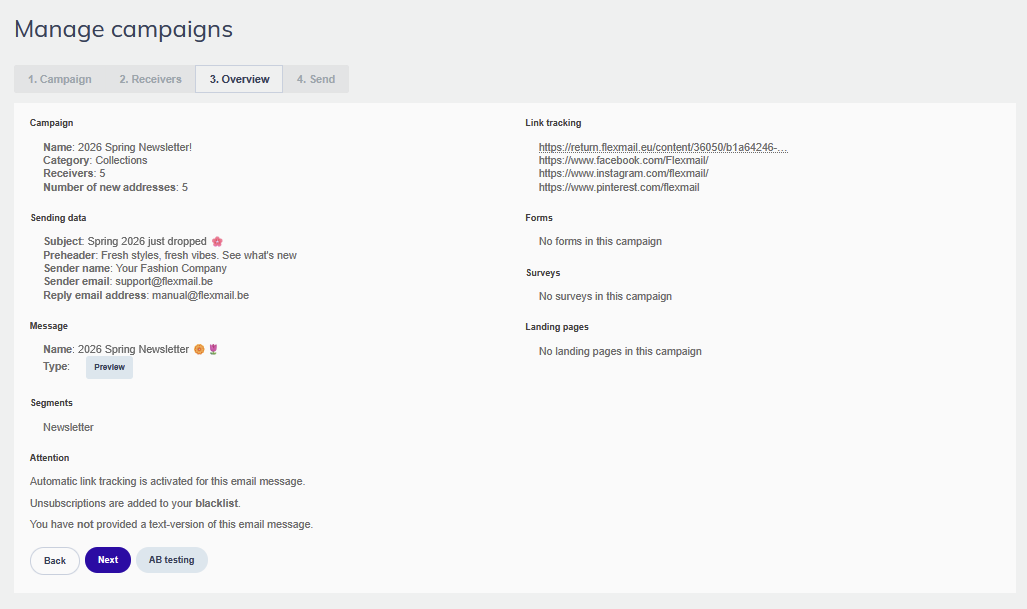
Step 3: review the overview
Before confirming your sending options, review everything on the overview page. You will see your Blacklist settings, the link tracking configuration, and any forms, surveys, or Landing pages linked to your message. Check whether a text version of your message is present; email clients that do not load HTML display this version. This also improves deliverability. This is also the place where you can add an AB test before proceeding.
Step 4: choose sending option
Choose when and how your campaign goes out: save without sending, send now, send at a scheduled time, or send in batches over a time window. You can also add notification email addresses that receive a confirmation once your campaign finishes sending.
Attention Do not delete contacts from your database while a campaign is still sending. This leads to inaccurate results in your campaign report.
Create an Opt-in campaign
Go to Campaigns, then Manage campaigns, and click Create new campaign > Create new Opt-in campaign. The setup works the same as an email campaign, with one important difference: the message you select must contain an #opt-in# placeholder link. This is what contacts click to reconfirm their subscription. Batch sending is not available for Opt-in campaigns.
Create an SMS campaign
- Go to Campaigns, then Manage campaigns, and click Create new campaign > Create new SMS campaign.
- Enter a campaign name and category.
- Write your SMS message. A character counter shows how many credits the message costs per contact.
- Select recipient segments. Contacts without a valid mobile number will not receive the message.
- Review the overview and send.
Create a test campaign
Start a test campaign from the same flow as a regular email campaign. In step 1, click the Test campaign button. Select only your internal test segment as the recipient and send. After sending the test, the status of the original campaign updates to Ready so you can continue without entering your settings again.
Practical tips
- Use categories to organise your campaigns from the start. Once you have dozens of campaigns, filtering by category works much faster than scrolling through a list.
- Set up your test segment before you need it: a small group of internal addresses covering Gmail, Outlook, and at least one mobile device. Reuse it for every campaign.
- Set up notification emails on campaigns you hand over to colleagues. They will know immediately when the campaign finishes sending without having to check in Flexmail.
Common mistakes to avoid
- Sending without a text version. Without a text version, devices that cannot load HTML see nothing. The overview page warns you if no text version is present.
- Using a sender address that is not validated. Unvalidated addresses cannot be selected in the campaign flow. Validate them in advance via Settings > Add or remove senders.
- Selecting the wrong segments in step 2. Check the recipient count on the overview page before proceeding; it should match your expectations.
- Not ticking "Update this campaign with the latest version of my message" while you are still editing the message. If you make changes after creating the campaign and this box is not ticked, your contacts receive the old version.
GDPR considerations
GDPR Only send campaigns to contacts who have given valid consent to receive your communication. Opt-in campaigns are a tool to reconfirm that consent if you are not sure, but the better approach is maintaining clean consent records from the start. Every campaign you send must be relevant to the receiving segment. Sending irrelevant emails damages deliverability and increases the risk of spam complaints, which in turn affects your ability to reach engaged contacts.
Next steps
- Send a test campaign first; see "The added value of a test campaign" for a full checklist.
- Set up AB testing to improve your subject lines and content over time.
- Review your campaign results via Campaigns > Campaign reports after sending.
- Use the relaunch feature to send the same campaign to new contacts added after the original send.