Get started with interests
Interests are labels you attach to contacts to track what they care about or want to receive. A contact is either subscribed to an interest or not — that binary nature makes them different from contact fields, which store actual data values.
Interests are one of the most versatile tools in Flexmail: useful for segmentation, personalisation, automation, and letting contacts manage their own preferences.
Support tip start with a small, clear set of public interests that reflect your main content categories. Five well-used interests will serve you better than twenty sparsely populated ones. You can always add more as your strategy develops.
Public vs. private interests
Public interests
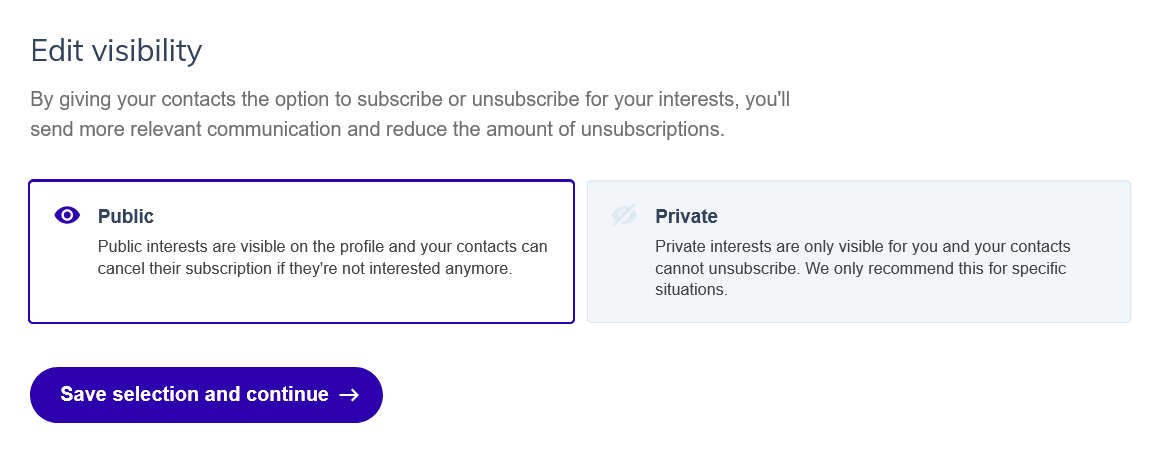
Public interests are visible to your contacts on their profile page and on your opt-in forms. Contacts can subscribe to or unsubscribe from them themselves. Use public interests for content categories you want contacts to opt into: newsletters, promotions, product updates, event invitations.
Private interests
Private interests are only visible to you in your account. Contacts cannot see them, manage them, or unsubscribe from them. Use private interests for internal behavioural tagging, for example "Clicked sustainability content" or "Attended webinar March 2025".
Attention private interests are available from Pro subscriptions onwards. On Start and Essential, you can only create public interests.
What you can do with interests
Segmentation
Create segments based on interest subscription. You can segment by a single interest, combinations of interests (subscribed to A and B), or exclusions (subscribed to A but not to B). These segments update automatically as interest data changes.
Campaigns
Send campaigns to a segment built on one or more interests. This lets you send relevant content to the contacts who have indicated they want it.
Dynamic content
Show or hide specific content blocks in your message based on a contact's interests. The same email can display different sections to different contacts, all sent in a single campaign.
Workflows
Use interests as triggers (when a contact subscribes or unsubscribes) or as conditions (if a contact has a specific interest, take one path; if not, take another). Workflow actions can also add or remove interests based on other triggers.
Before you start
It helps to plan your interest structure before you begin. A few questions to guide you:
- What different types of content or communication do you send?
- Which contacts want which types?
- Do you want contacts to be able to manage their own interests, or do you want to keep them internal?
That last question determines whether each interest should be public or private. If an interest is for internal use and you don't want contacts to manage it, make it private from the start.
Step 1: Create your interests
- Go to Contacts → Interests.
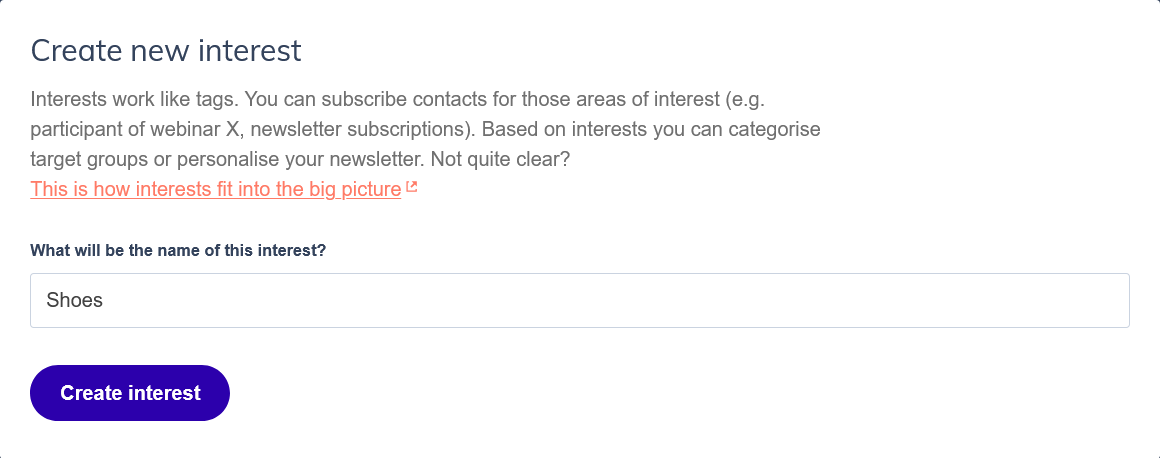
- Click Add interest.
- Enter an internal name for the interest. This name is only visible to you — it's how you identify the interest in segments, workflows, and imports. Choose something clear and consistent.
-
Click Create interest.
- Choose the visibility: Public or Private.
-
Click Save selection and continue.
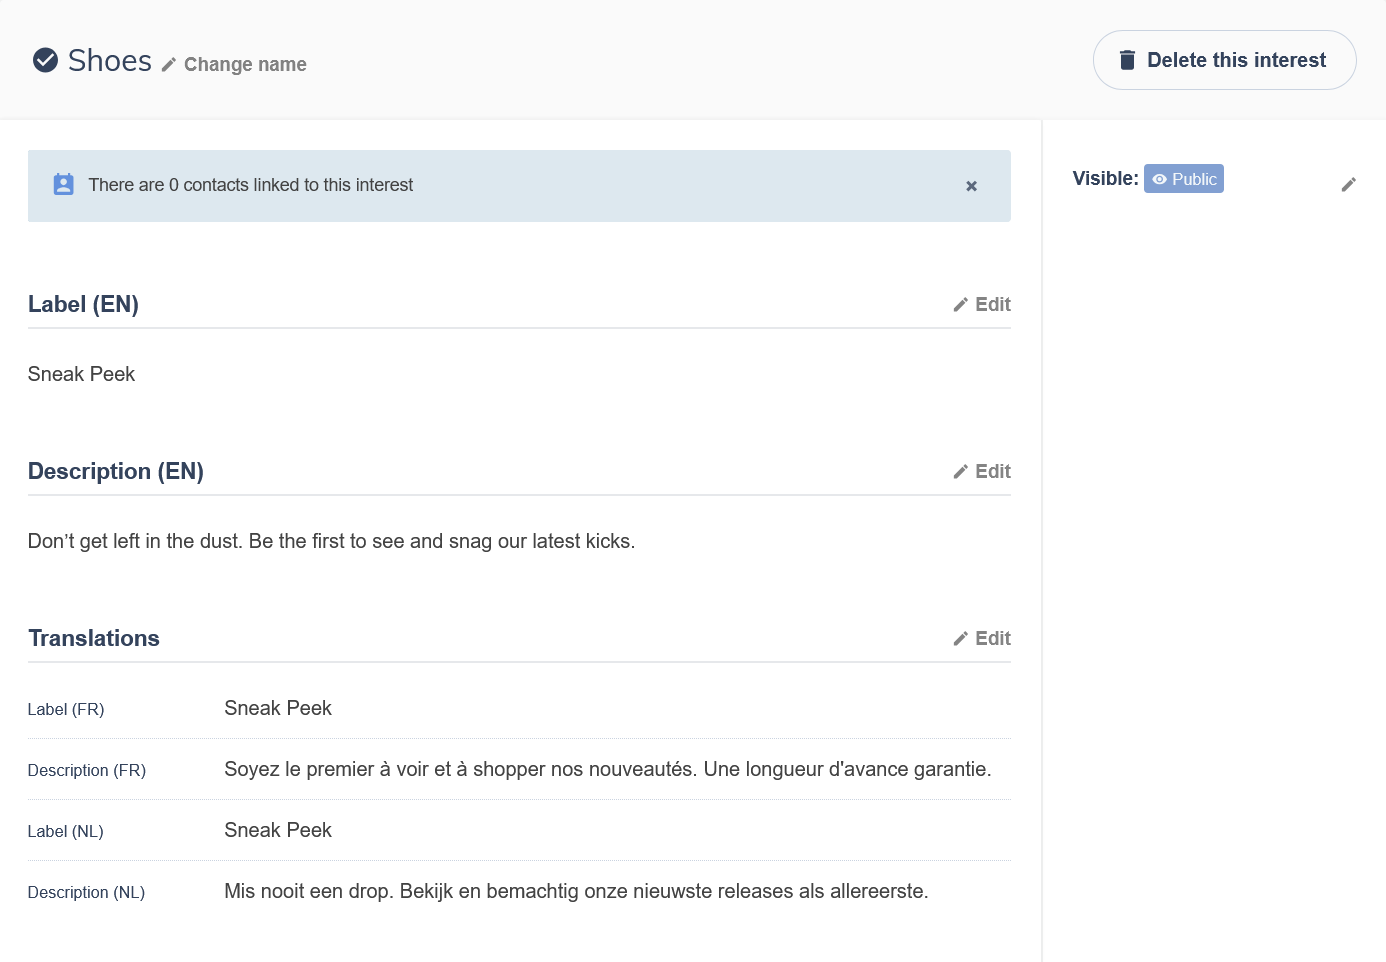
- Add a label and optionally a description. The label is the name contacts will see on their profile page and in opt-in forms. The description helps contacts understand what they're signing up for, for example: "Our monthly newsletter with tips and news". A description is optional but strongly recommended for public interests.
- Click Save interest.
- If you send in multiple languages, add translations for the label and description. You only create the interest once; Flexmail automatically shows the correct language version to each contact.


Support tip write a clear description for every public interest. When contacts are deciding which interests to subscribe to, the description is the main thing that helps them choose. "Weekly product updates" is much more useful than just "Products".
Step 2: Linking interests to your opt-in forms
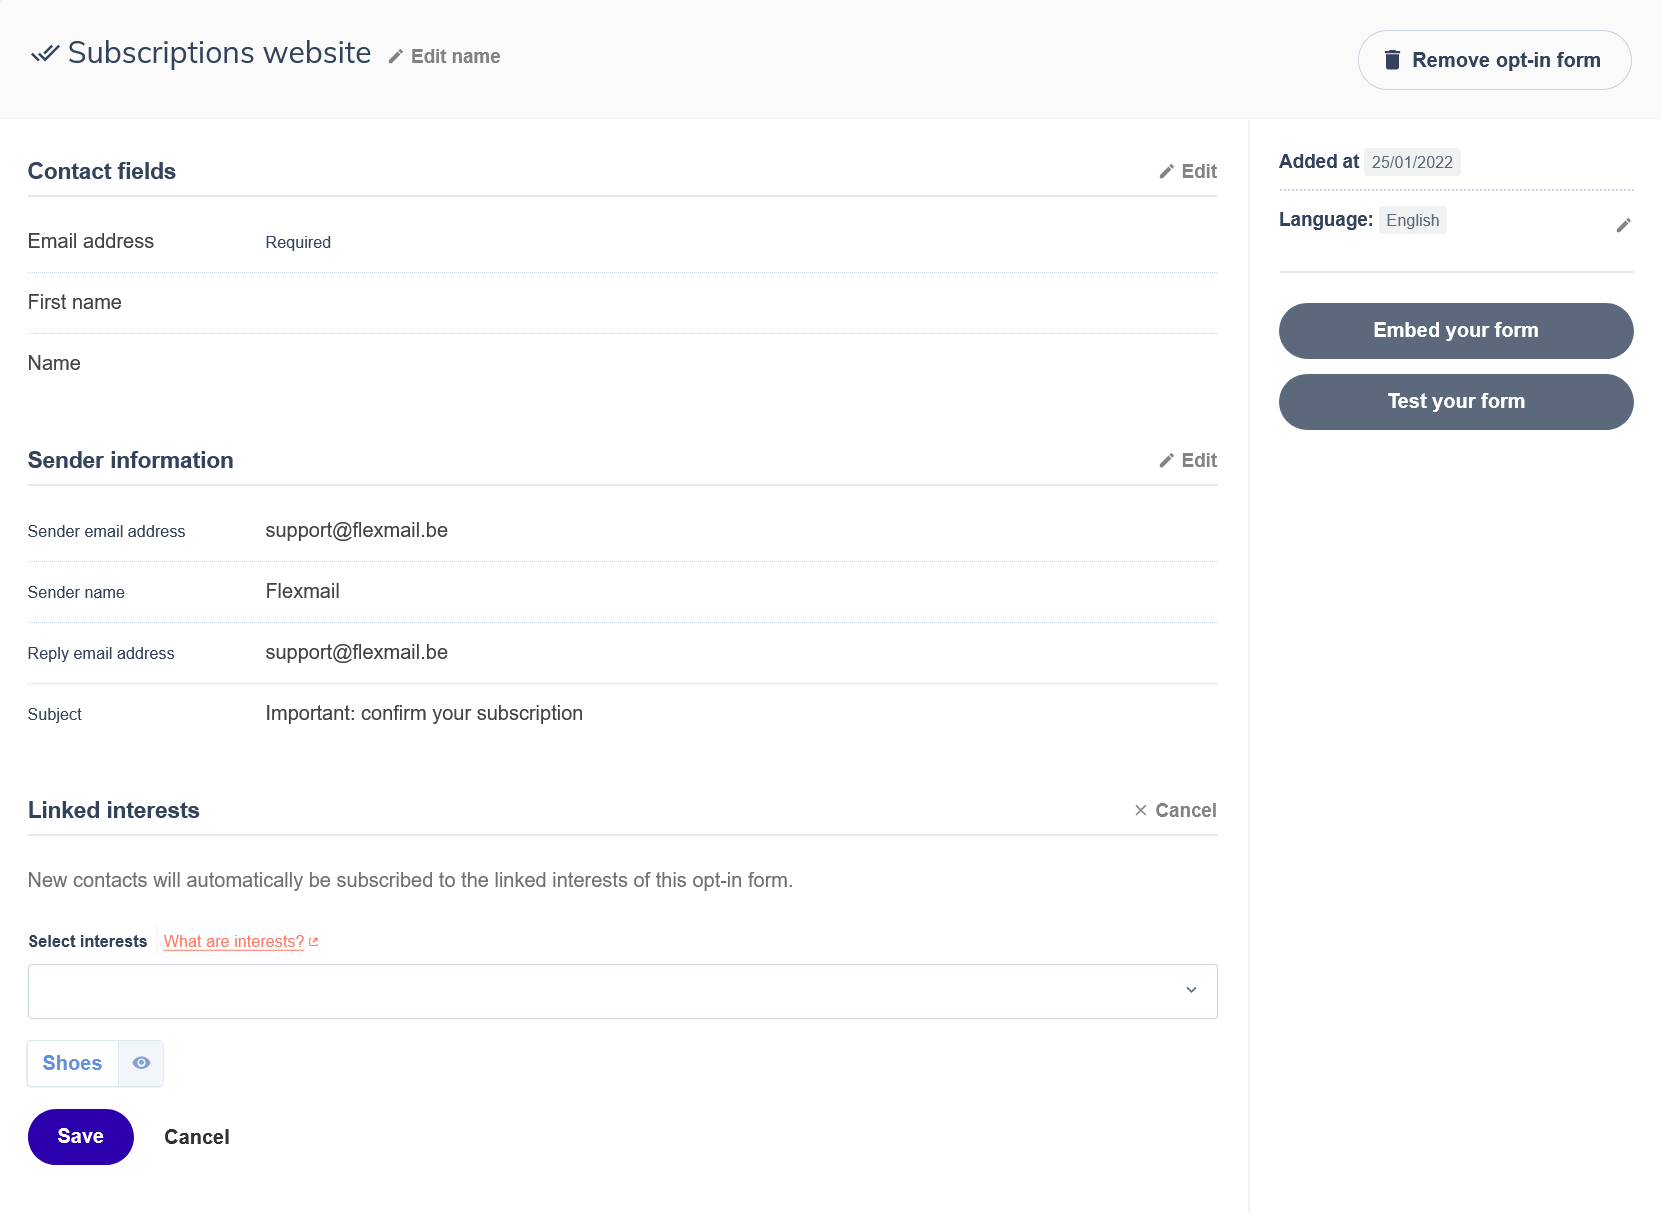
New contacts who subscribe through an opt-in form can be automatically assigned interests. This is the easiest way to start building interest data from the very first sign-up.
- Go to Forms → Opt-in forms.
- Open an existing form or create a new one.
- In the form settings, choose which interests new subscribers from this form should be added to. You can link up to five interests per form.
Think about the context of each form. If a form is on a product page, contacts subscribing there are likely interested in product updates. Contacts can always adjust their own interests after confirming their subscription.
Step 3: Assign interests to your existing contacts
Getting your existing contacts into the right interests is the most important part of the initial setup. There are three practical approaches:
Option A: Assign interests per contact via CSV
Add an Interests column to your CSV file. In each row, list the interest names separated by commas if there are multiple. Names must exactly match what you created in Flexmail; interest names are case-sensitive. Import the file and map the Interests column to the Interests field. Your contacts keep all their existing data, and the interests are added on top.
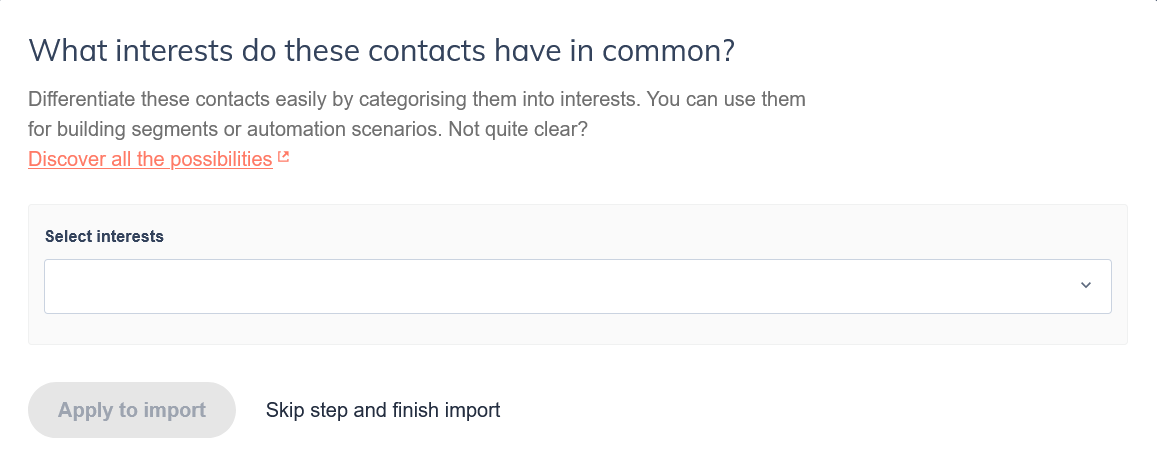
Option B: Assign the same interest to all contacts in an import
If you're importing a group of contacts who should all share the same interest — for example, all your existing newsletter subscribers — you can assign an interest to the entire import batch in the final step of the import flow. No extra column needed in your file.
Option C: Ask contacts to update themselves
Send an email to your existing contacts asking them to update their profile and choose their interests. Use the #update# placeholder as your call-to-action link; this takes contacts directly to their profile page where they can set their own preferences. This approach works well if your new interest structure is significantly different from how you previously organised your audience.
Attention contacts who previously unsubscribed from a specific interest cannot have that interest re-assigned via import. Only the contact themselves can re-subscribe to an interest they've opted out of.
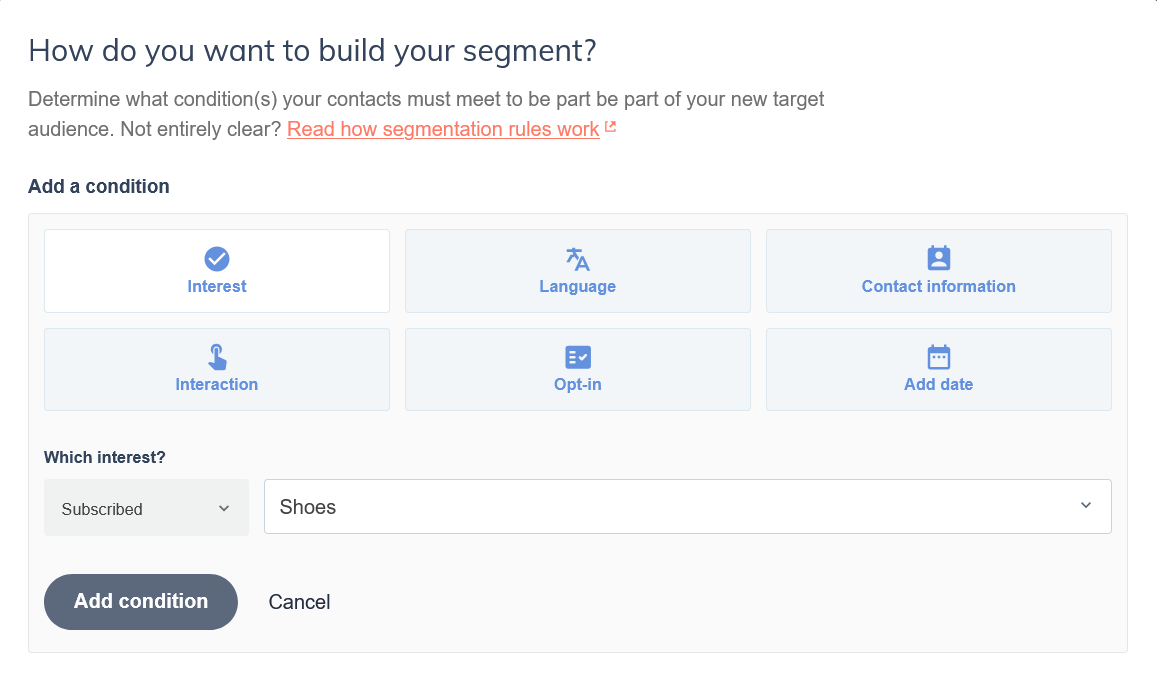
Step 4: Create segments based on your interests
With your contacts in the right interests, create at least one segment per interest so you can send targeted campaigns. Go to Contacts → Segments and add a condition: Interest → Subscribed → [interest name].
If you send in multiple languages, create language-specific sub-segments. For example: "Newsletter NL" and "Newsletter FR" as separate segments, both based on the same interest but filtered by language.
Keeping interests up to date
Once the initial setup is done, interests can maintain themselves passively:
- Link tracking: assign an interest to a specific link in your email. Any contact who clicks that link is automatically added to that interest. After a few campaigns, you'll have a much richer picture of what your audience actually engages with, without asking anyone to fill in a form.
- Workflows: add or remove contacts from interests as part of automation scenarios, for example when a contact registers for an event or completes a purchase.
- Manually: when adding or editing a contact individually, you can assign interests directly on their contact detail page.
Support tip don't wait until your interest data is perfect before you start using it. Even a rough initial assignment based on your existing lists is enough to begin sending more relevant campaigns. Interest data improves naturally over time.
Common mistakes to avoid
- Creating too many interests at once. Start with the interests you'll actually use in campaigns or workflows. Unused interests add clutter and make data harder to keep clean.
- Mixing up public and private interests. Don't use a public interest for something contacts shouldn't be able to see or manage, like an internal behavioural tag. Use private interests for anything operational.
- Using interests to store data that belongs in a contact field. An interest is a subscription or a tag, not a stored value. If you need to record something like a customer number or a contract date, use a contact field instead.
- Forgetting case sensitivity during import. Interest names must match exactly, including capitalisation. "Newsletter" and "newsletter" are treated as different values.
- Building too many interests before seeing which ones get used. Map out a small set of clear, usable interests first. It's easier to add more later than to clean up a tangled structure.
- Skipping the segment creation step. Without segments, you can't send to a specific interest. Build your segments as soon as your interests are populated.