Get started with the Wizard template
What the Wizard Template offers
- Ready-to-use, mobile-responsive templates.
- Simple text, image, and link editing directly on the template.
- Colour theme customisation, change all accents at once.
- Link tracking.
- Personalisation placeholders.
- Seasonal templates available around Christmas and other occasions.
What the Wizard Template does not support
The Wizard Template does not support custom HTML, drag-and-drop layout changes, or showing and hiding sections based on contact data (dynamic content). For those capabilities, use the Email builder or the HTML editor.
When to use the Wizard Template
- You want a polished, consistent layout quickly with minimal setup.
- You don't need custom column configurations or dynamic content blocks.
- You're sending a straightforward newsletter, announcement, or promotional email that fits one of the available templates.
Available templates
- Mobile - 1 - Header (logo, title), hero/banner, articles (thumbnail, title, CTA), footer (name, address, social)
- Mobile - 2 - Hero/banner, logo, social icons, featured articles (large thumbnail, title, CTA), secondary articles (small thumbnail, text CTA), footer (name, address)
- Mobile - 3 - Header (logo, title), hero/banner, 3-column features (thumbnail, title), articles (thumbnail, title, CTA), footer (name, address, social)
- Mobile - 4 - Header (logo), hero/banner, title, social icons, articles (thumbnail, title, chevron CTA), footer (name, address)
- Mobile - 5 - Header (logo), main article (hero, title, CTA), banner, CTA section, 3-column features (thumbnail, title, CTA), calendar/activities, articles (thumbnail, title, CTA), footer (name, address, social)
- Mobile - 6 - Header (logo, title), main article (hero, CTA), 2-column articles (thumbnail, title, CTA), spotlight article (50% thumbnail, CTA), articles (thumbnail, title, CTA), 6-icon row, footer (name, address, email, website, social)
- Mobile - 7 - Main article (hero, title, CTA), CTA bars (before/after articles), spotlight article (50% thumbnail, CTA), 3×2 image grid, 2-column articles (thumbnail, title, CTA), footer (name, address, email, website, social)
- Mobile - 8 - Hero image, 3-column features (title, CTA), 2-column articles (thumbnail, title, CTA), 3-column articles (thumbnail, title, CTA), spotlight (33% thumbnail, CTA), 6-icon row, footer (name, address, email, website, social)
- Template - 2 - Header (hero/banner, date, title), introduction, articles (thumbnail, title, text CTA), closing text, footer (banner, name, address, email, website)
- Template - 3 - Header (banner, date, title), full-width article, footer (name, address, phone, fax, email, website)
- Template - 4 - Header (title, hero/banner), main area (introduction, articles with thumbnail/title/CTA, closing text), sidebar (date, ToC, mini banners), footer (name, address, phone, fax, email, website)
Support tip If none of the available templates match your needs, contact sales@flexmail.be to have a custom Wizard template created for your brand.
Prerequisites
- You have access to Campaigns > Messages in your Flexmail account.
- Your content is ready, text, images at the correct dimensions for the template you're using, and your call-to-action URL.
- Set up your test profile in Settings so personalisation placeholders show realistic data in the preview.
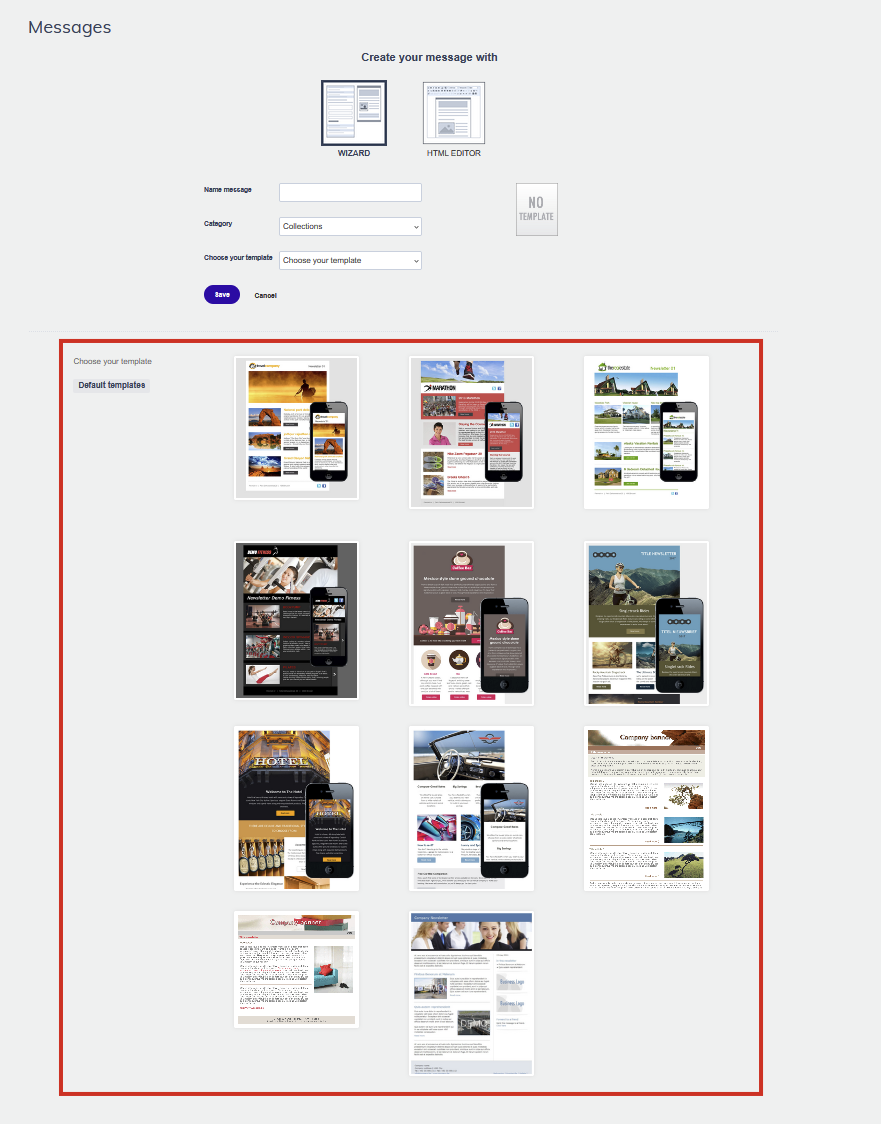
Create a new message
- Go to Campaigns, then Messages.
- Click Create new message.
- Click Wizard to select the Wizard editor.
- Give your message a name and select a category.
- Choose a template from the list. Click a template thumbnail to preview it before selecting.
- Click Save to open the editor.
Edit your template
Edit text
Click any text area to edit it directly. Use the text toolbar that appears to change font, size, colour, and alignment.
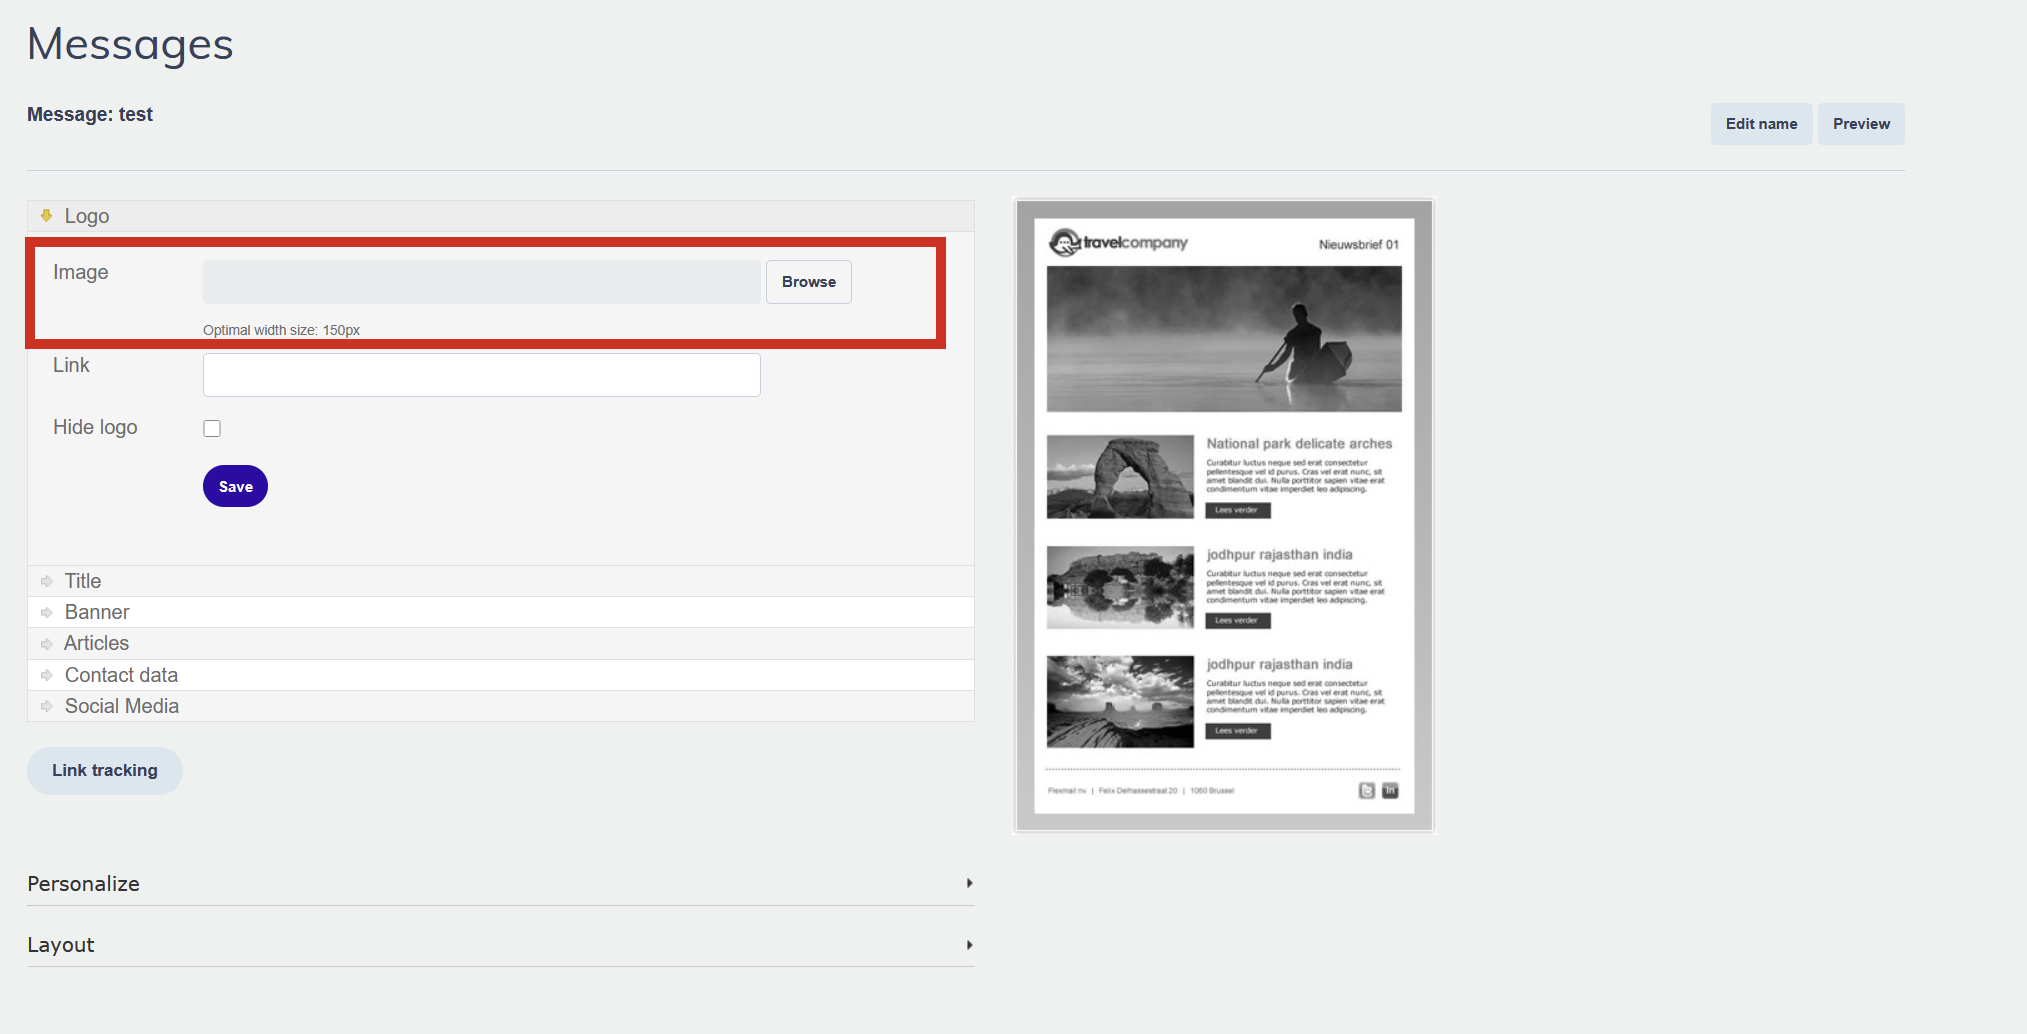
Replace images
Click any image placeholder to upload a new image or select from your media library. The placeholder shows the recommended dimensions, use images at those dimensions to prevent stretching or cropping.
Add links
Highlight text and click the link icon to add a hyperlink, or click an image to add a link to it. You can link to external URLs, landing pages, forms, surveys, or files in your media library.
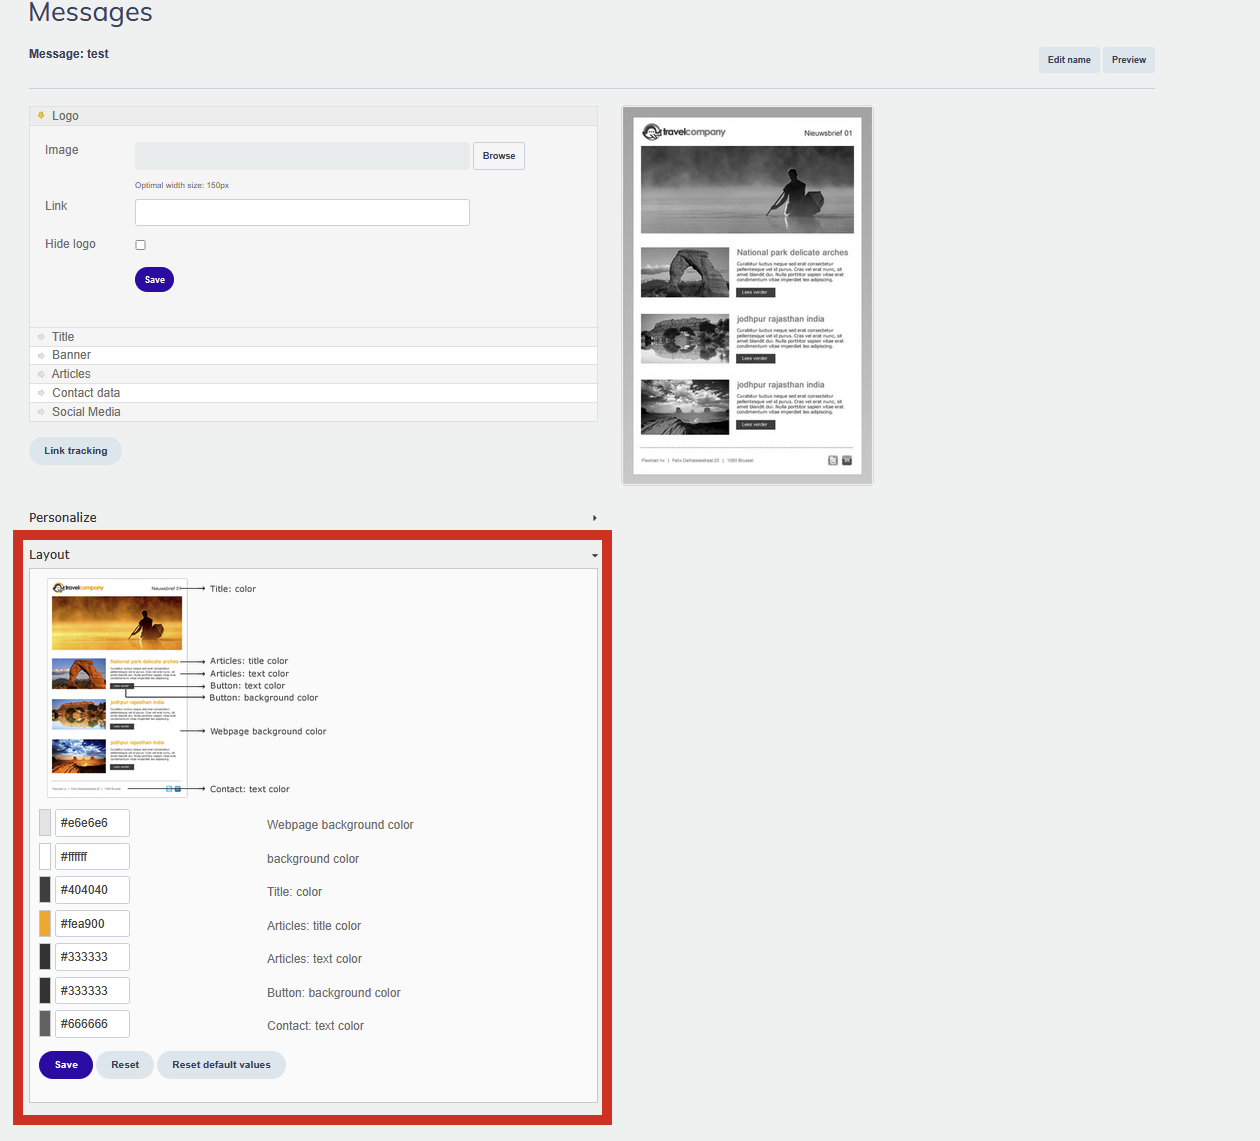
Adjust colour theme
Use the colour settings at the top of the editor to change the template's global colour theme. This updates all template accents, buttons, dividers, and headers, at once.
Add personalisation placeholders
Click the placeholder icon in the text toolbar to insert personalisation. Placeholders like #firstname# are replaced with real contact data when the email is sent.
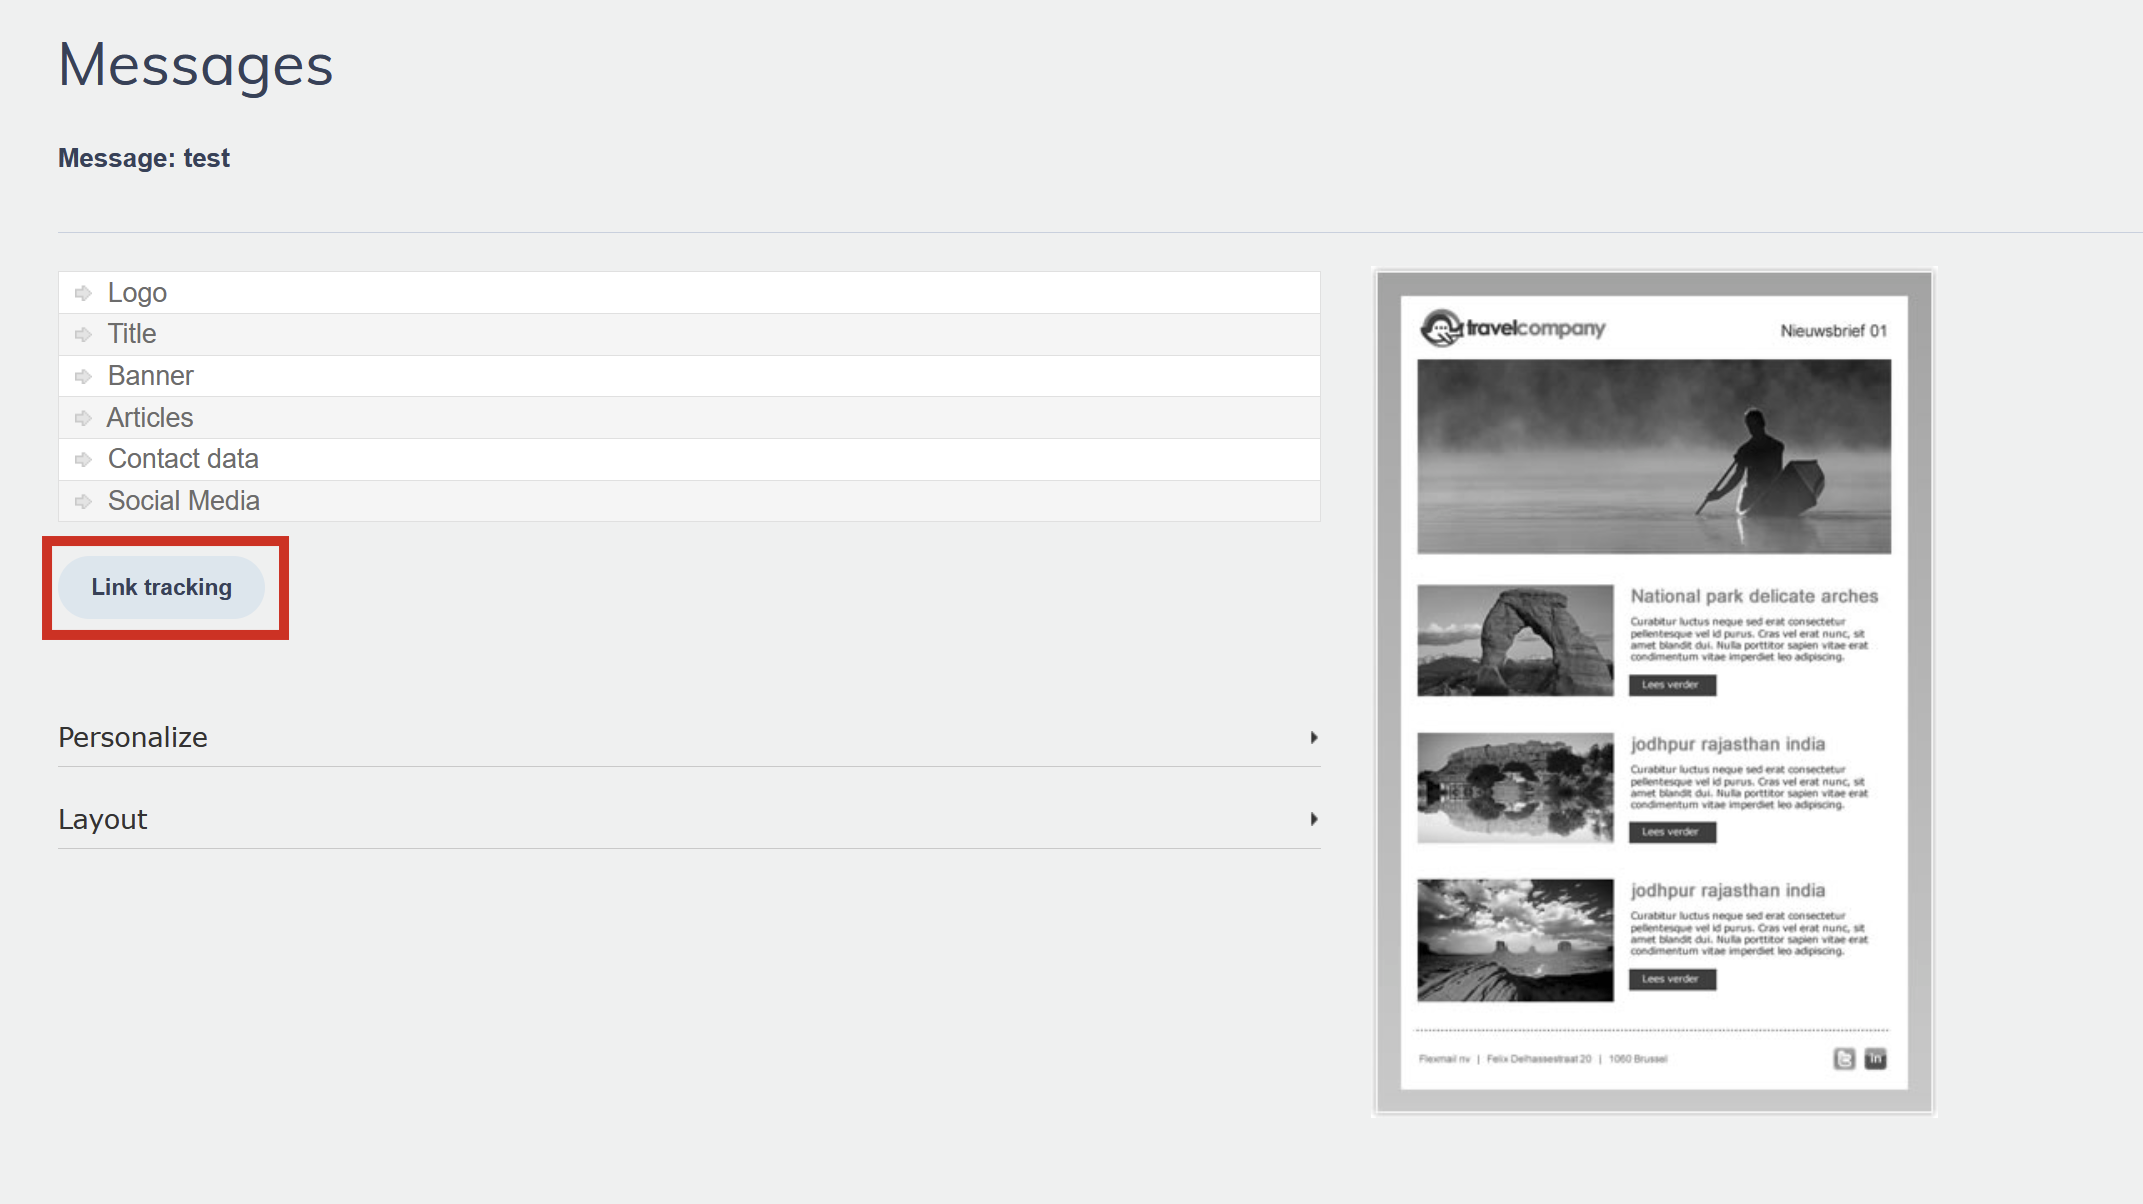
Link tracking
After finishing your message content, scroll down to find the Link tracking section. All links in your message are listed here. Enable or disable tracking per link and optionally assign an interest to each. See "Link tracking" for details.
Preview and save
Click Preview at the top of the editor to see your message with test profile data applied. When you are satisfied, click Save. Your message is now available in your message list for use in a campaign.
Support tip Fill in your test profile in Settings before previewing so personalisation placeholders show realistic data rather than empty fields.
Pro tips
- Use the mobile preview to check how the template looks on small screens before finalising. All Wizard templates are responsive, but image dimensions and text length can still affect the mobile experience.
- Keep article text concise. Wizard templates have fixed section structures, very long text can push other sections down in unexpected ways.
Common mistakes to avoid
- Not checking the recommended image dimensions for each placeholder. Uploading an image with very different proportions will result in stretching or cropping.
- Skipping the link tracking section. Scroll down after editing your content to make sure tracking is configured for your key links.
- Using the Wizard for emails that need dynamic content. The Wizard doesn't support conditional sections. Switch to the Email builder for that.
Next steps
- See "Types of Wizard Templates" for a visual overview of each template's layout.
- See "Personalise a message with placeholders" for the full list of available personalisation placeholders.
- Once your message is ready, create a campaign in Campaigns > Manage campaigns.