Get started with opt-in forms
An opt-in form is a subscription form you place on your website to let visitors sign up for your email communications. When someone fills in the form, Flexmail sends them a confirmation email. Once they click the link in that email, they're added to your account as a confirmed contact and are ready to receive campaigns.
Flexmail always uses double opt-in. There is no single opt-in option. This is a deliberate choice to protect both you and your contacts. See 'Why Flexmail only offers double opt-in' for the full explanation.
How the process works
- A visitor fills in your opt-in form on your website.
- Flexmail automatically adds them as an unconfirmed contact and sends them a confirmation email.
- The contact has 72 hours to click the confirmation link. If they don't, the link expires and they need to subscribe again.
- Once they click, they move from unconfirmed to confirmed status and can receive your campaigns.
What you can collect
At minimum, an opt-in form collects an email address. You can also add:
- Default contact fields: first name, last name, language
- Custom fields: any field you've created in your account
- Interest selections: let contacts indicate which topics they want to receive content about
Support tip Keep your opt-in form as short as possible. Every additional field reduces completion rates. Email address alone is usually enough to get started. You can collect more data later through forms and preference updatepages.
Where you can use opt-in forms
- Embedded on your website via the HTML embed code
- Embedded on a Flexmail landing page, of which you can share the link on social media, in an email, or anywhere else
- Inside a Flexmail message as part of an opt-in campaign, to re-confirm consent from existing contacts
What happens to existing contacts
If a contact who is already in your database fills in your opt-in form again, their status is updated based on the confirmation. If they were previously unconfirmed or inactive, completing the double opt-in process brings them back to confirmed status. Any new field values or interest selections they submit are added to their existing contact record.
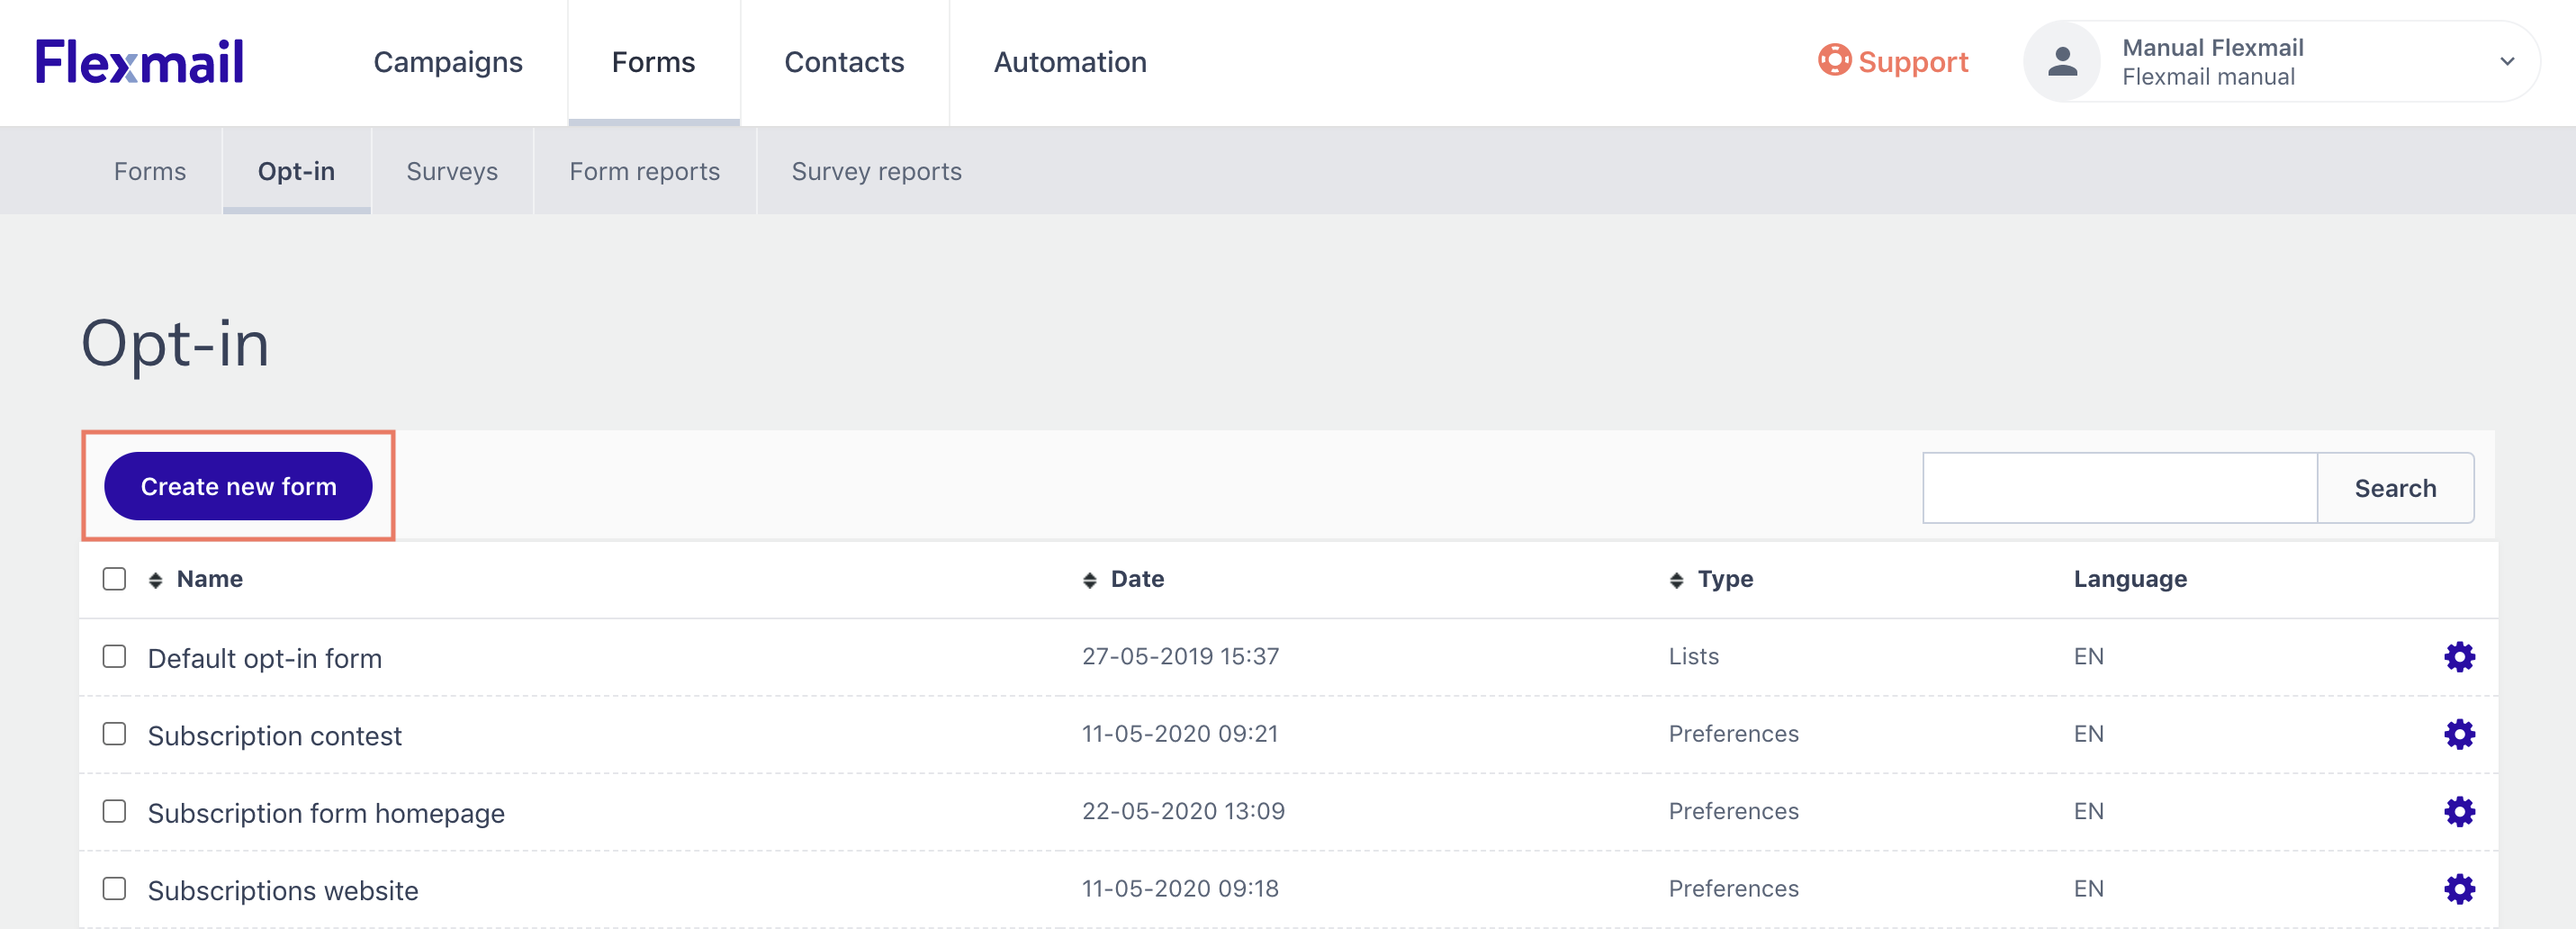
Create an opt-in form
Step 1: Name and language
-
Go to Forms, then Opt-in forms.

-
Click Create new form.
-
Enter an internal name for the form. Contacts won't see this
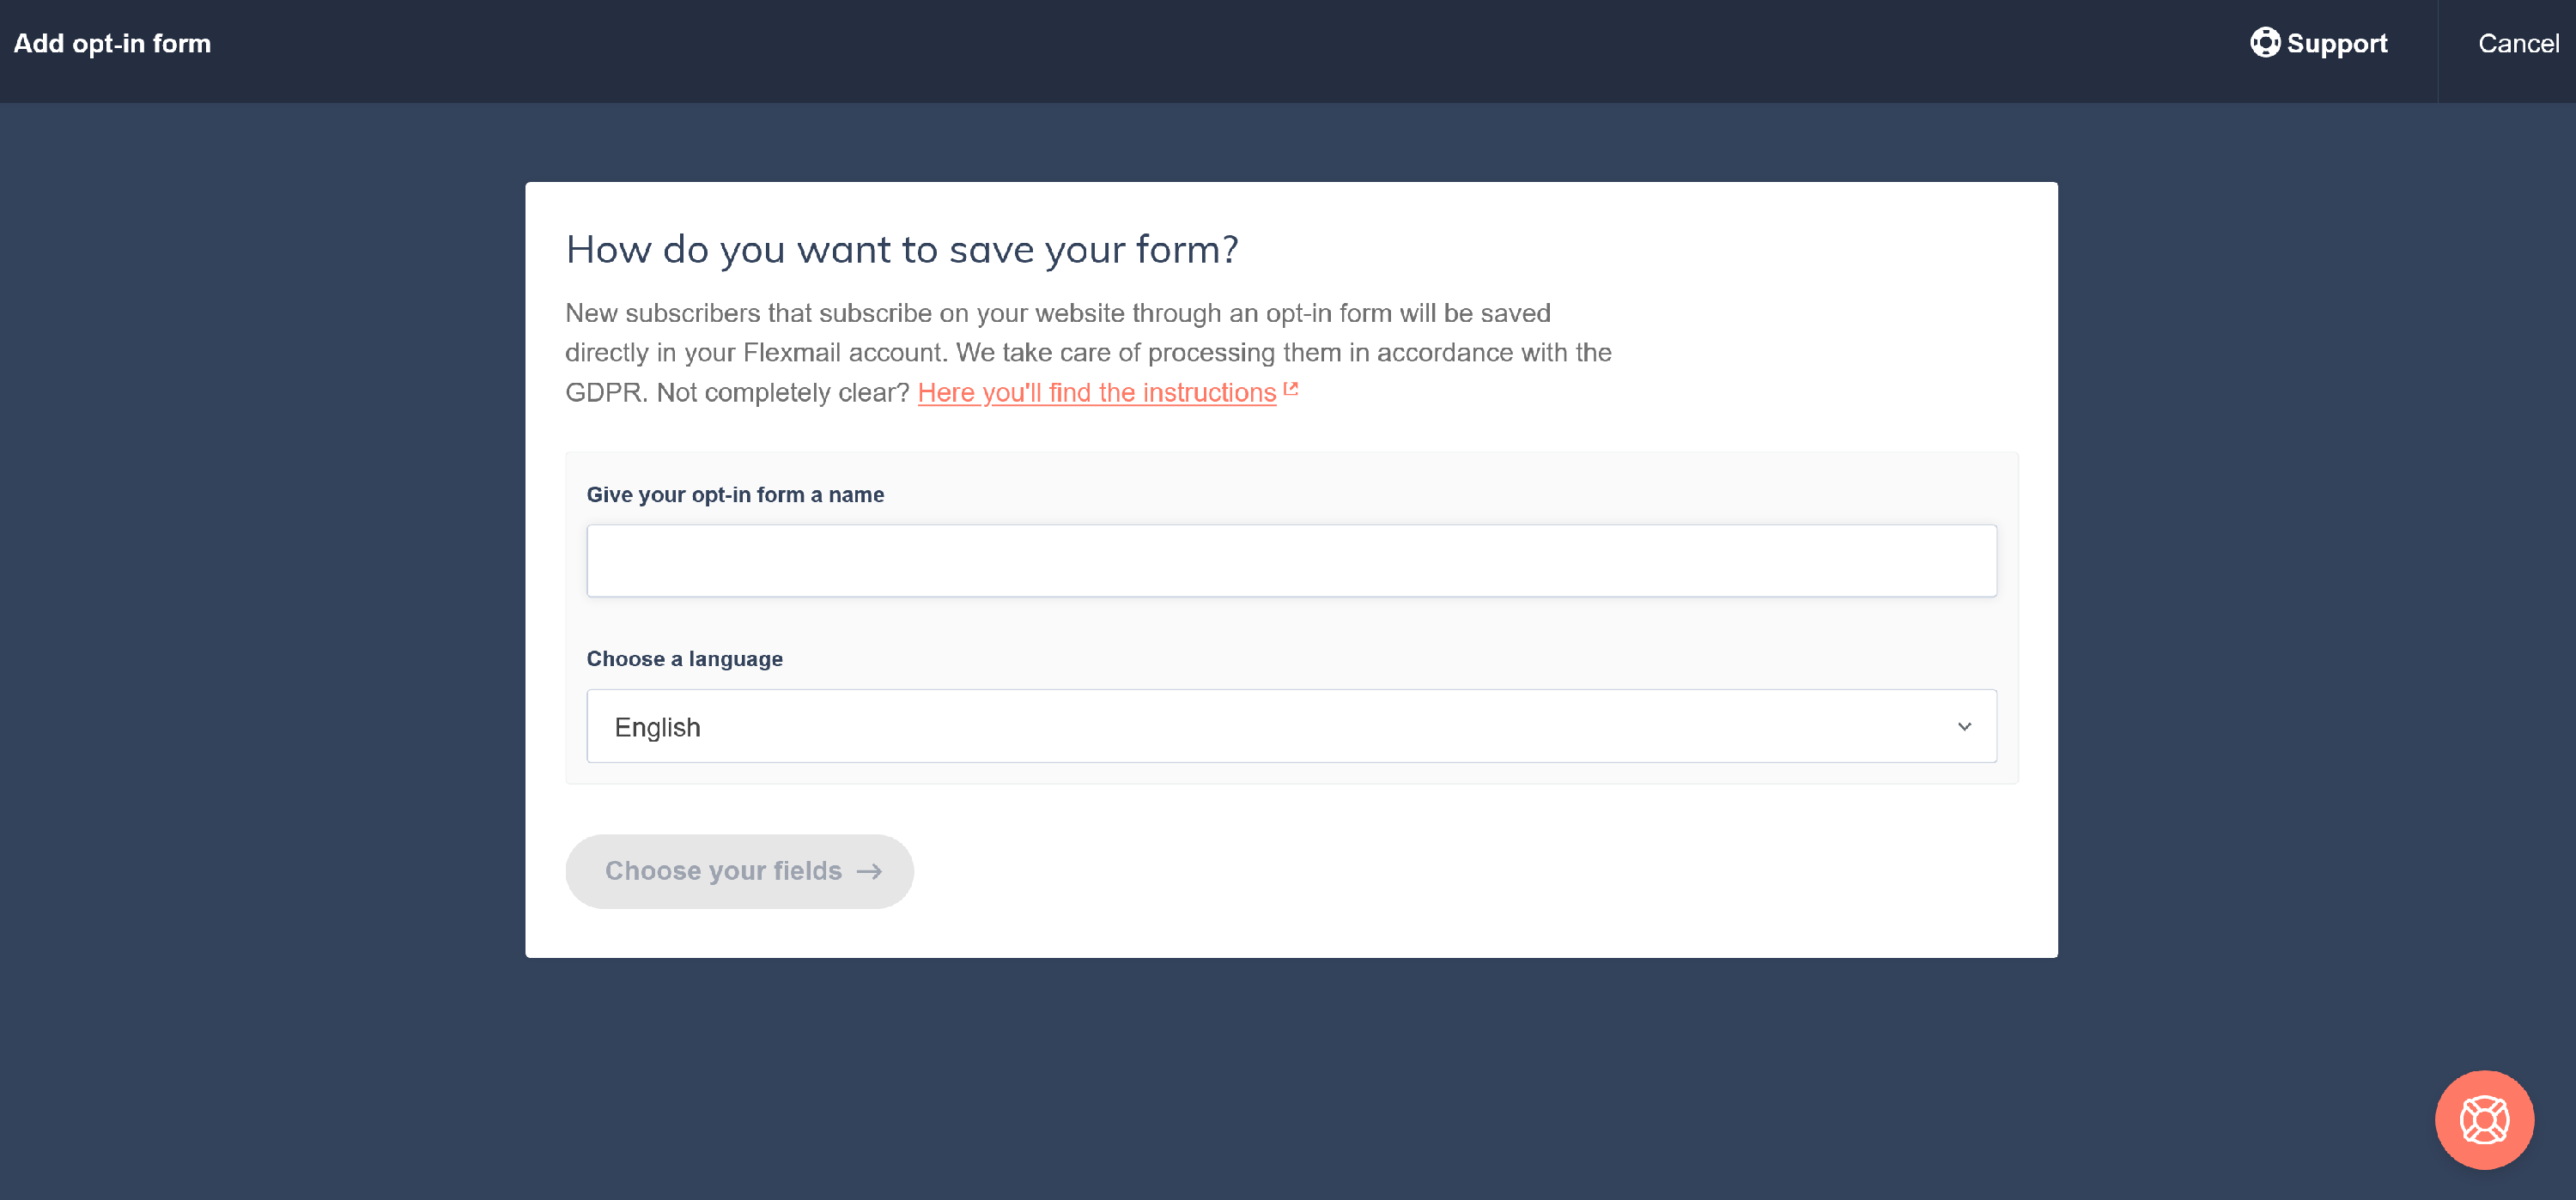
- Select a language. This determines the language of all buttons and default texts in the form.
- Click Choose fields.


Step 2: Choose your fields
- Email address is always included. Add any other fields you want: first name, last name, custom fields, and interests.
- Drag fields to reorder them.
-
Mark fields as mandatory or optional.

- Click To form settings.

Step 3: Form settings
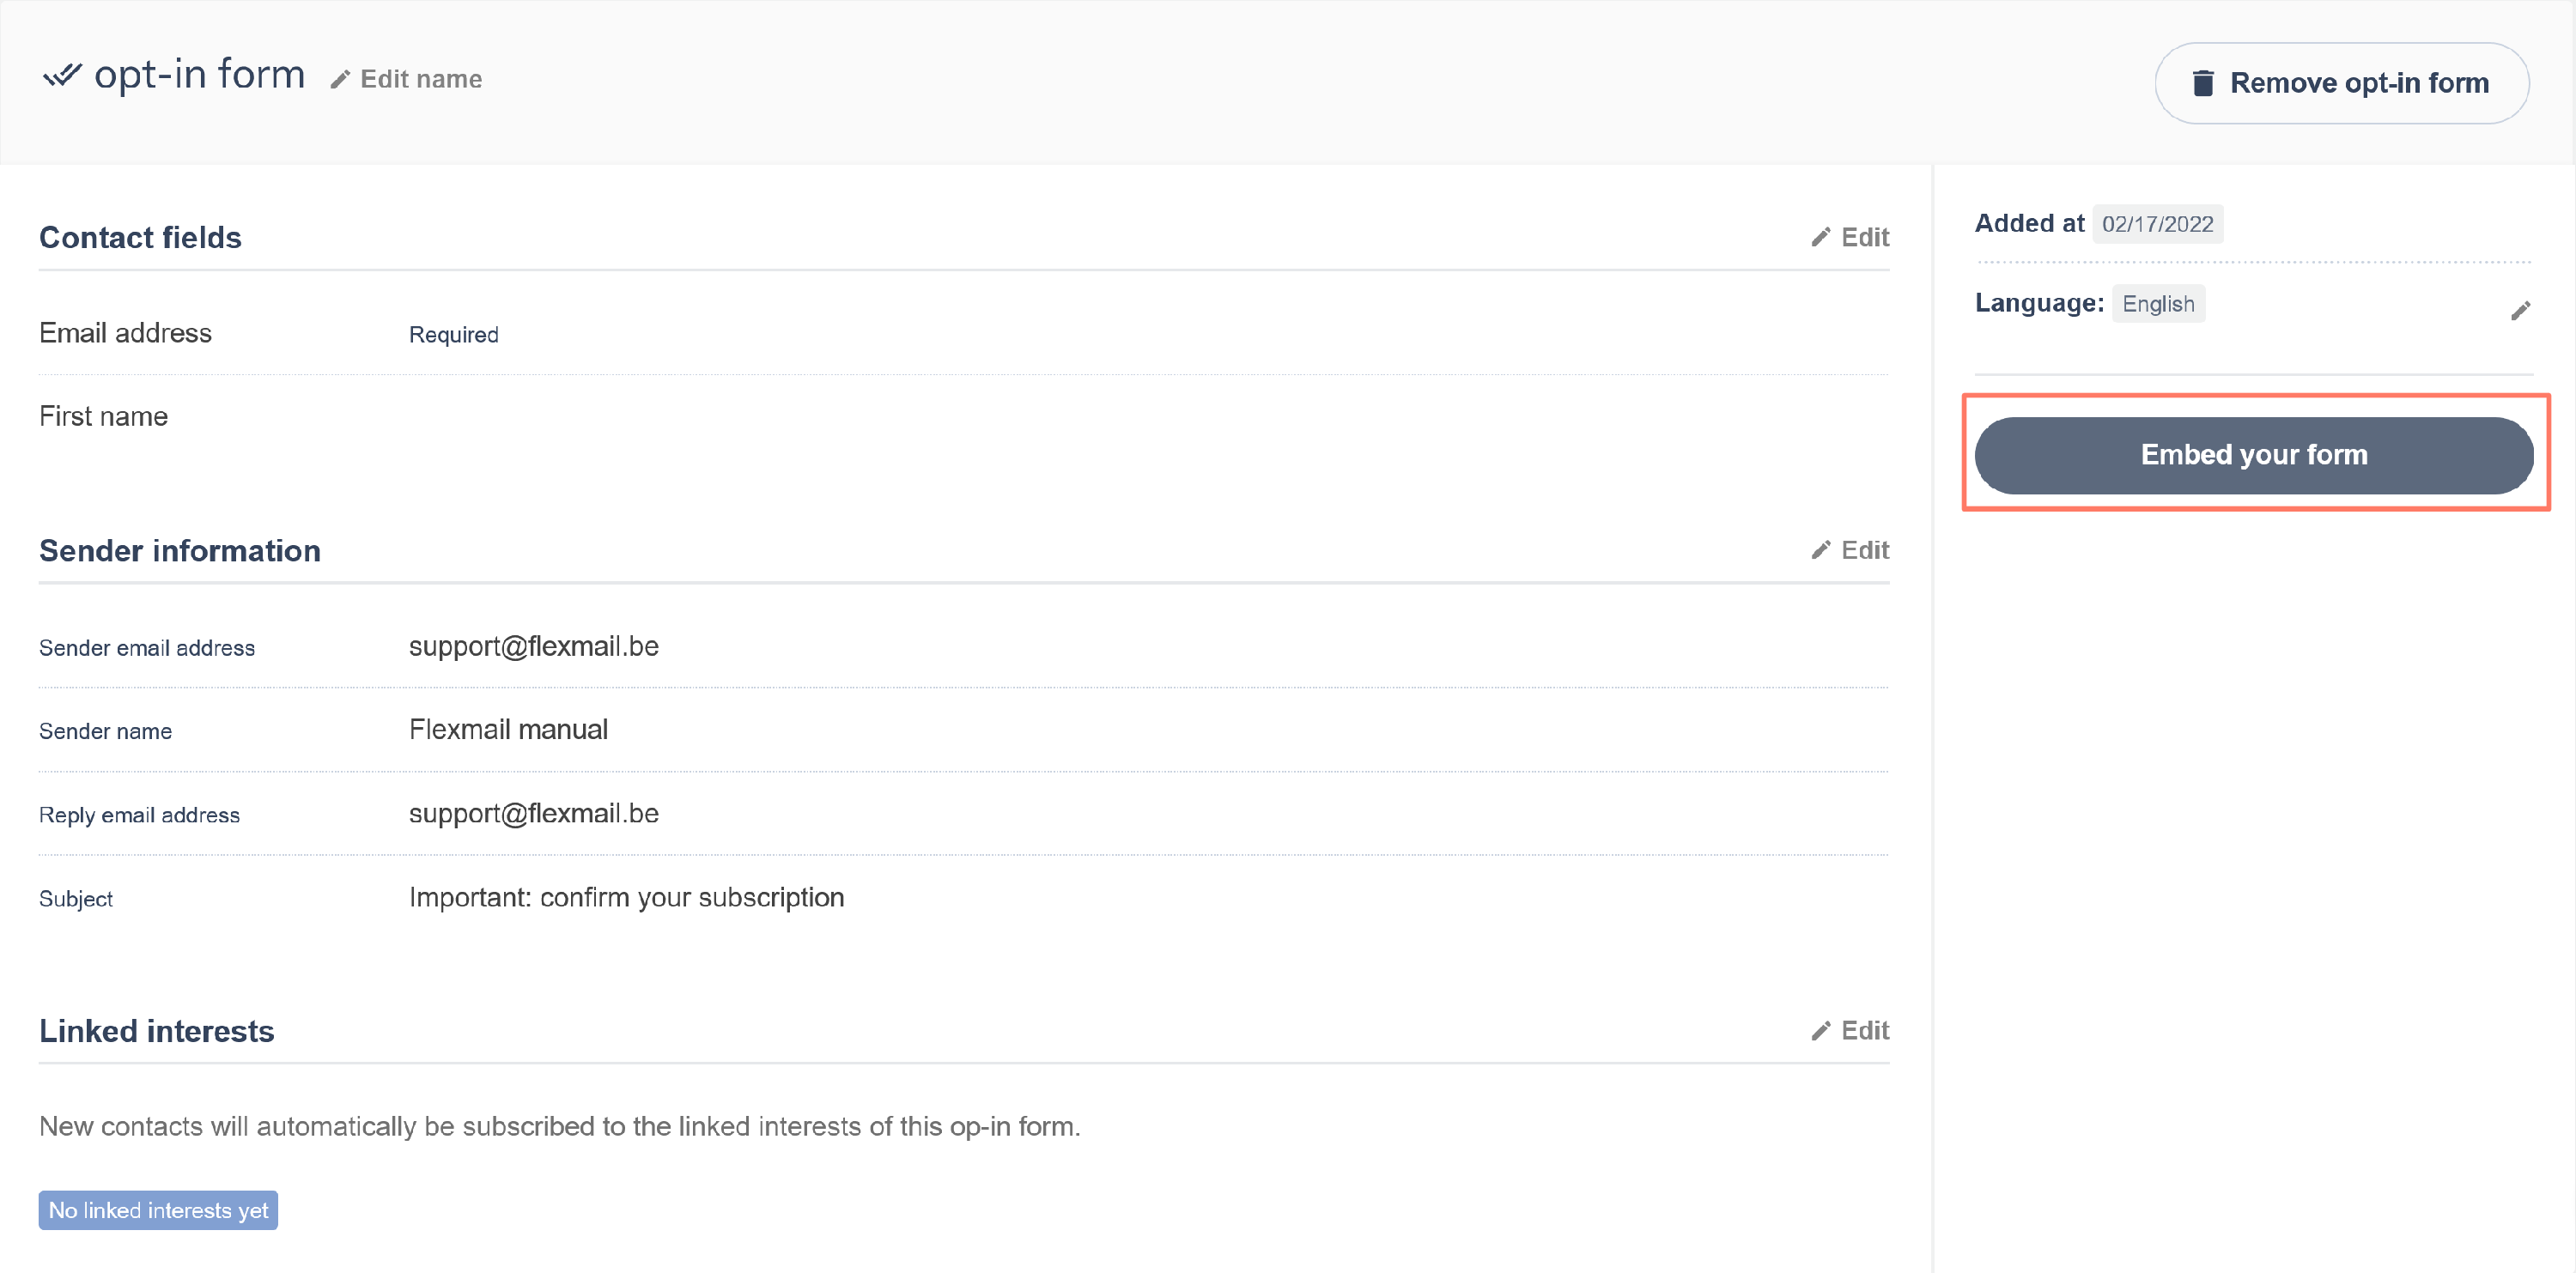
- Enter the sender name and email address for the confirmation email. This must be a validated sender address in your account.
- Optionally pre-assign up to five interests. Contacts are subscribed to these automatically upon confirmation, but can adjust them on their profile page.
- Click Save form.

Get your embed code
After saving, Flexmail generates an embed code that you can paste into your website HTML to display the form inline.

Support tip Test your form after embedding it. Complete a test subscription yourself to verify the confirmation email arrives correctly and the contact appears in your account.
Using an opt-in form in a campaign
You can share an opt-in form inside a Flexmail message as part of an opt-in campaign to re-confirm consent from existing contacts. Use the #opt-in# placeholder, this works in messages created with the Wizard or HTML editor.
Attention When you send an opt-in campaign, all recipients are immediately set to inactive. Only contacts who click the confirmation link become active again. Use opt-in campaigns deliberately, they can significantly reduce your sendable contact count if response rates are low.
The confirmation email
Flexmail sends the confirmation email automatically. You can customise the sender name and email address that appear in the confirmation.
When a contact confirms, they are taken to their profile page where they can see the linked interests they are pre-subscribed to, and subscribe to any other public interests from there.
The confirmation email uses Flexmail's default template. To make it more personal and engaging, see 'How engaging is your confirmation email?' in the Messages section.
GDPR considerations
GDPR Opt-in forms with double confirmation are the most robust way to collect GDPR-compliant consent. Each completed subscription generates a documented record: the contact's email address, the date and time of confirmation, and the opt-in form they used. This documentation is stored automatically in Flexmail.
Next steps
- See 'Why Flexmail only offers double opt-in' for the rationale behind double opt-in.
- See 'Tips for an effective opt-in form' for conversion optimisation advice.
- See 'How engaging is your confirmation email?' to improve your confirmation message.
- See 'How do I get the most out of opt-in forms?' for advanced use cases.